Knowledge Base
Designer
How To
- eSignature Configuration
- Custom Field Types
- Create Advanced Automations
- Create Security Policies
- Visual Components & Dependencies
- Automated Notifications
- Automations That Trigger Outbound Communications
- CDT Configuration
- Charts & Graphs: How to Configure
- Create Formulaic Custom Data Type Fields
- Create Patient Facing Assessment (PFA) Folders
- Configure Help Section
- Configure Phone Names
- Customize Action Bar
- Defining Regions and Territories
- Document Types: How To Configure
- Filtering With Message Template Variables
- How to Add Assessments to a Template
- Filtering With Message Template Variables
- How To Associate Assessments with Programs
- How to Create Navigation Layouts
- How To Create an Assessment or Form Template
- Patient Data View
- Zoom: How to use telehealth in Designer
- Opt Out Patients from SMS Communications
- Assessments - How to Add Conditionality
- Create User Notifications
- Create Automated Appointment Reminders
- Turning on Notifications for Communications
- Create PDFs from Forms & Assessments
- Configuring Security Policies
- How to create and configure roles
- Designer: Enable Patient Delete
- Designer: How to Configure Scored Assessments
- Designer: How to Create Automations
- Encounters: Dependencies
- DocuSign: Implementation Checklist
- Export Designer Configuration
- Create Tasks
- Communication center: how to create message templates
Overview
Features Overview
- Visual Components
- Security Policy Detail
- Task Management
- API Exports: Usage
- Designer: User Access
- DocuSign: Feature Overview in Designer
- Enable Patient Delete
- Brand Terminology: Flexibility
- Designer Overview
- Forms: Conditional Logic
- Programs and Phases
- Webhooks
- Notifications and Alerts
- Automations
- Presentation: Customized Layouts and Action Bar
- Data Views
- Dictionaries
- Custom Data Types (CDT)
- Change Summary and Version History
- eRx: Overview
Data Views
Designer: Feature Overview – Data Views
Data Views are customizable user interface components that present information in the Care portal in order to view, collect, and manage information. Data Views consist of Custom Data Types (CDTs) which can be presented in a single record or table view. Users have full control over how fields are labeled and presented as well as whether they are read only or have add/edit capabilities.
To access the Data Views, click on ‘Data Views’ under the “Visual Components” heading in the left side menu in Designer. Existing Data Views can be accessed and modified, or a new Data View can be created by clicking on the orange “+ New” button in the upper right hand corner.

The following steps are how to create a new Data View
- Enter a title for how the Data View will be displayed in Designer in the “Title (Designer) field under New Data View
- Select the CDT to be used in this Data View from the dropdown box under “Data Type”
- With the “View (Fields)” tab highlighted on the left:
- Replace ‘View’ in the “Title (Care)” box with the Data View’s name as it will appear in Care
- Select if the “Width” of the box in Care will be 100% or 50%
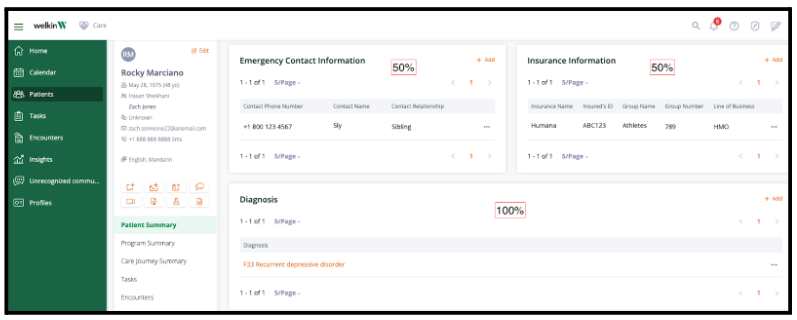

- Select if the layout of the Data View should be in a ‘Table (List)’ or show a single entry
- ‘Table (List)’ will show each time a new entry is made to the CDT. Single entry will only present the most recent valt
- Default Entries’ is the number of entries that will be visible in Care
- Select the data type fields and system fields you’d like displayed in Care from those listed under “Available Fields” by either clicking on the + icon in the data type field box, or by dragging it to the right under “Visible Columns (Fields)” heading – To change the field’s label (the field’s title in Care), click on the data type field box, then add the label on the far right

 The fields’ order can be changed by dragging a field under the “Visible Columns (Fields) heading and moving the field up or down to its desired location
4) The “Sort (Default) tab allows the CDTs to be sorted in Care based on the selected data type fields (Note: fields created as multiple select cannot be used)
- Click on “+ Data Type Field”
- Choose the field that should be sortable in Care
- Click the arrow between the data type field dropdown and trashcan to have the CDTs sorted in descending or ascending order
- Add more multiple select fields from the CDT by repeating steps a and b
5) The “Filters (Default) tab allows searchable data type fields created as “Lists” to be shown or hidden in Care
- Choose the ‘Data Type Field’ the filtering should be based on by selecting it from the dropdown box
- Select the ‘Values’ that should be shown in Care
- Any values not selected will be hidden in Care for this entire Data View. This is also the case for any other fields in the CDT that were selected to be shown in “View (Fields) for this Data View
- For example, if the possible selections are ‘Yes’ and ‘No’, and ‘Yes’ is selected, then any fields in the CDT containing the field with ‘No’ will not be displayed in Care
- Any values not selected will be hidden in Care for this entire Data View. This is also the case for any other fields in the CDT that were selected to be shown in “View (Fields) for this Data View
6) The “Bulk Edit” tab activates the bulk edit capability in Care for any fields in the Data Type that were selected as bulk editable
- To activate, click on the check box to the right of the field name
7) The “Add Form” tab allows each field associated with the Data Type to have new data entered manually for the Data Type in Care. Moving fields to the right activates the “+ Add” button for the Data View in Care.
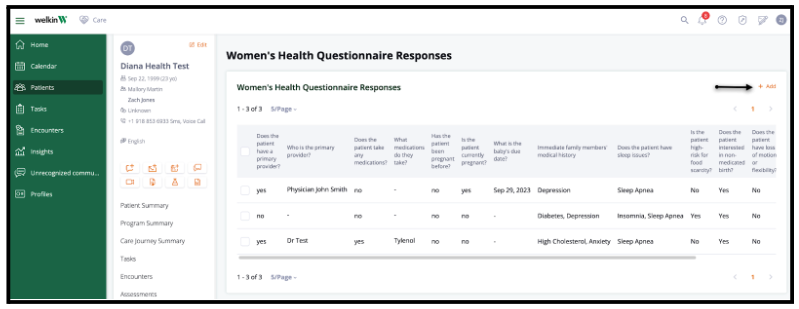
- Move the fields listed under “Available Fields” to the right either by clicking on the + icon in the data type field box or by dragging it to the right under the “Visible Columns (Fields)” heading
- To change the field’s label (the field’s title in Care), click on the data type field box, then add the label on the far right
- A HTML field can be added by clicking on “+ HTML Field”
- Click on the field box titled “HTML-*”Add the desired verbiage to the text box
- Clicking on the icon that looks like four squares under the ‘Clear All’ button allows that particular line’s number of fields to be changed. For instance, the single gray box will have only one field listed in that line. The four vertical boxes in a row allows up to four fields to be shown on that line
- The Add feature can be turned off for all users by toggling the orange ‘On’ switch next to the “Add Form” title
8) The “Edit Form” tab allows each field associated with the Data Type entry to be manually edited for the Data Type in Care. Moving fields to the right activates the “…” button for the Data View in Care.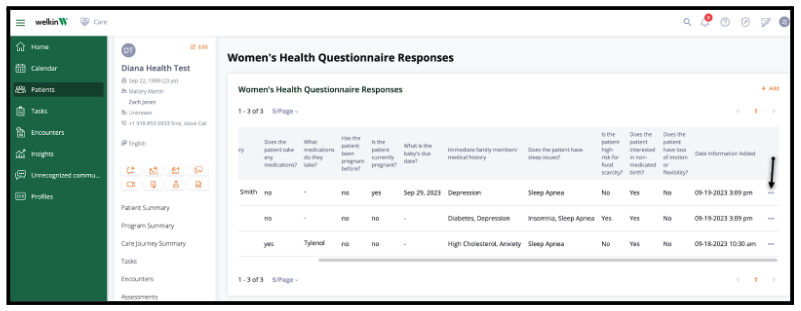
- Move the fields listed under “Available Fields” to the right either by clicking on the + icon in the data type field box or left clicking on the box and dragging it to the right under “Visible Columns (Fields)” heading
- To change the field’s label (the field’s title in Care), click on the data type field box, then add the label on the far right
- A HTML field can be added by clicking on “+ HTML Field”
- Click on the field box titled “HTML-*” & Add the desired verbiage to the text box
- Clicking on the icon that looks like four squares under the ‘Clear All’ button allows that particular line’s number of fields to be changed. For instance, the single gray box will have only one field listed in that line. The four vertical boxes in a row allows up to four fields to be shown on that line
- The Edit feature can be turned off for all users by toggling the orange ‘On’ switch next to the “Edit Form” title
9) Once finished click the “Save” button
More Questions?
If you have any questions regarding Data Views or Data Types , please visit the Welkin Health Knowledge-Base or contact your Implementation/CSM for more information.