Knowledge Base
Designer
Designer Overview
Designer Version History
Designer Automations
Designer Programs
Designer Profiles
Designer Patients
Designer Custom Data
Designer Visual Components
- Visual Components
- Visual Components & Dependencies
- Filtering With Message Template Variables
- Filtering With Message Template Variables
- How To Create an Assessment or Form Template
- How To Associate Assessments with Programs
- How to Add Assessments to a Template
- How to Configure Scored Assessments
- Create PDFs from Forms & Assessments
- Create Patient Facing Assessment (PFA) Folders
- Charts & Graphs: How to Configure
- Charts & Graphs: Filter, change date and by data point
- Forms: Conditional Logic
Designer Access Control
Designer Task Management
Designer Encounters
Designer Communications
Designer Terminology
Designer Help Page
Turning on Notifications for Communications
Sending Notifications for communications is often enabled for those who may not be able to check or tend to messages right away – or want to be notified immediately of any incoming correspondence from a patient.
To enable this functionality in Designer, scroll down on the left vertical menu bar to “User Notifications” and select “User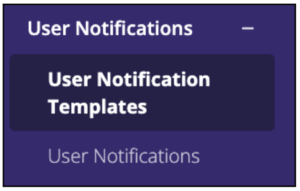 Notification Templates”
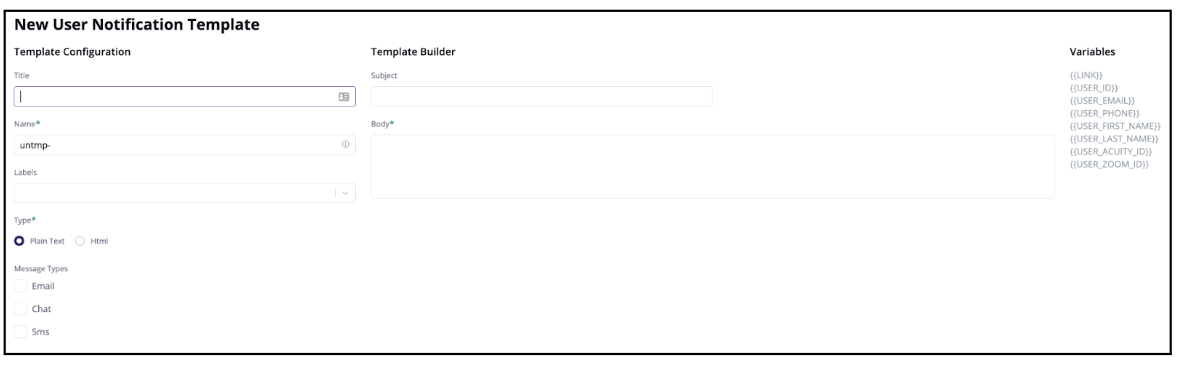
Select “+New” in the upper right corner to start a new template
Add a Notification Template Title
Select Type: Plain Text or HTML
Select Message types: Email, SMS, Chat
Add a Subject and Body to your notification (the variables on the right can be added to the message body only)
Select “Save Changes” when finished
On the left hand vertical menu, select, “User Notifications” and click “+New” in the upper right corner.
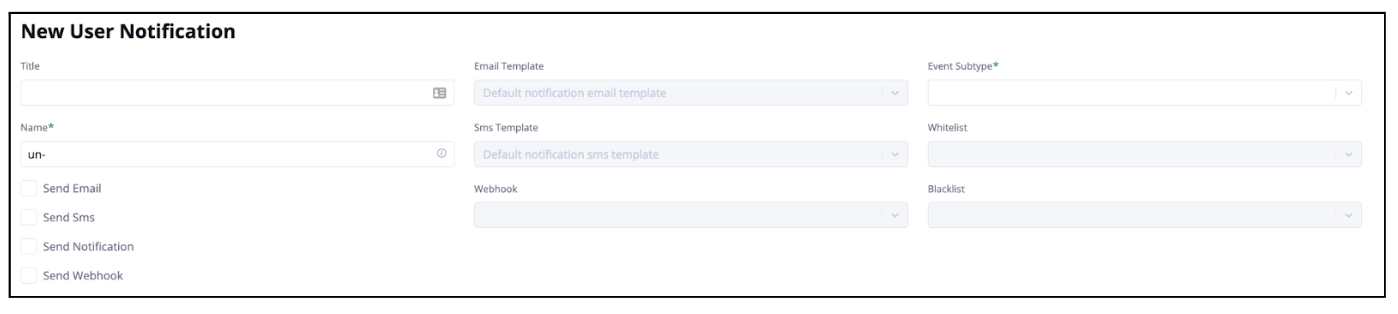
Create a title for the new user notification
Select how the user will be notified: Email, SMS, Notification, or you can select send a webhook
Selecting the notification type will enable you to select the template below the relevant dropdown menu.
Select the event sub-type for which the notification should be sent
When finished, select “Save Changes”
More Questions?
If you have any questions regarding User Notifications for Comms , please visit the Welkin Health Knowledge-Base or contact your Implementation/CSM for more information.