Knowledge Base
Designer
Designer Overview
Designer Version History
Designer Automations
Designer Programs
Designer Profiles
Designer Patients
Designer Custom Data
Designer Visual Components
- Visual Components
- Visual Components & Dependencies
- Filtering With Message Template Variables
- Filtering With Message Template Variables
- How To Create an Assessment or Form Template
- How To Associate Assessments with Programs
- How to Add Assessments to a Template
- How to Configure Scored Assessments
- Create PDFs from Forms & Assessments
- Create Patient Facing Assessment (PFA) Folders
- Charts & Graphs: How to Configure
- Charts & Graphs: Filter, change date and by data point
- Forms: Conditional Logic
Designer Access Control
Designer Task Management
Designer Encounters
Designer Communications
Designer Terminology
Designer Help Page
How to Create Navigation Layouts
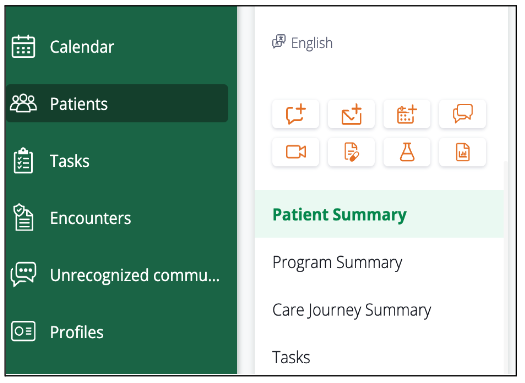
Navigation Layouts are the tabs listed under the Patient Profile in Care that contain patient information. Navigation Layouts
allow you to create a patient view and structure information in accordance with your program. Within that Navigation Layouts you can add
Data Views and other UI components and define how the data will be displayed under certain categories in the patient’s record. In the below image, Patient Summary, Program Summary, etc. are examples of Navigation Layouts.
To create a Navigation Layout in Designer follow the below steps:
- Go to Navigation (Layouts) under “Patient” in the left menu options of Designer
- Click “+New”
- Give the Navigation Layout a title as it will appear in Care
- Choose the Roles that will have access to the Navigation Layout in Care from the ‘Roles’ dropdown menu
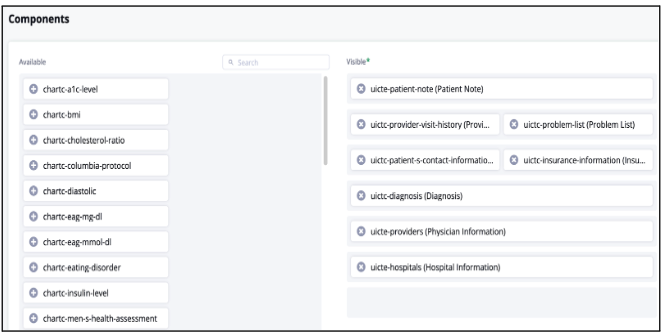
- Choose the components in the left ‘Available’ column. These are UI components within Welkin such as CDT’s, Programs, Encounters, Assessments, and Charts and Graphs
- Move the ‘Visible’ UI components either up, down, or beside each other to configure the order in which they will appear in the Navigation Layout of Care

To learn more:
- about Data Views follow this link: https://welkinhealth.com/kb/data-views/
- about how to create Roles follow this link: https://welkinhealth.com/kb/how-to-create-roles/
More Questions?
If you have any questions, please visit the Welkin Health Knowledge-Base or contact your Implementation/CSM for more information.