Knowledge Base
Designer
Designer Overview
Designer Version History
Designer Automations
Designer Programs
Designer Profiles
Designer Patients
Designer Custom Data
Designer Visual Components
- Visual Components
- Visual Components & Dependencies
- Filtering With Message Template Variables
- Filtering With Message Template Variables
- How To Create an Assessment or Form Template
- How To Associate Assessments with Programs
- How to Add Assessments to a Template
- How to Configure Scored Assessments
- Create PDFs from Forms & Assessments
- Create Patient Facing Assessment (PFA) Folders
- Charts & Graphs: How to Configure
- Charts & Graphs: Filter, change date and by data point
- Forms: Conditional Logic
Designer Access Control
Designer Task Management
Designer Encounters
Designer Communications
Designer Terminology
Designer Help Page
Change Summary and Version History
The Change Summary is the first page seen when logging into Designer.
The purpose of the Change Summary is to show all changes made within Designer while working within a draft.
To create a draft – click on the ‘Create Draft’ button. Drafts can be created from the current version or from a JSON file.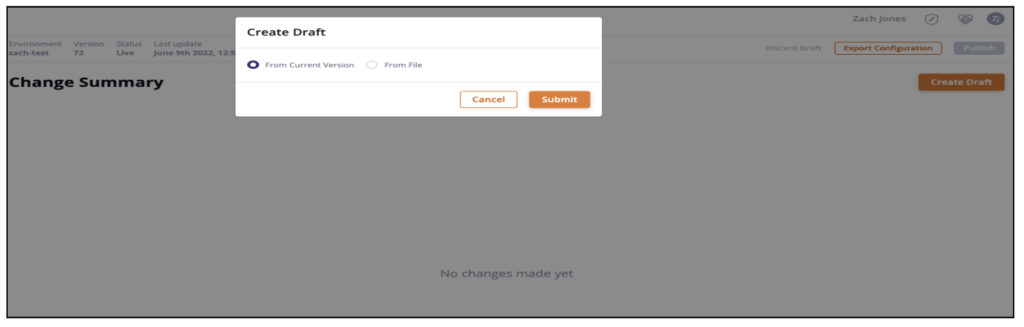
Creating a draft from the current version will allow you to keep working on your saved configuration.
Creating a draft from file will allow you to search your computer for the desired JSON configuration you wish to upload into the current environment
Click on ‘Submit’ to start working on the configuration.
Any changes made in Designer will show as line items in the Change Summary screen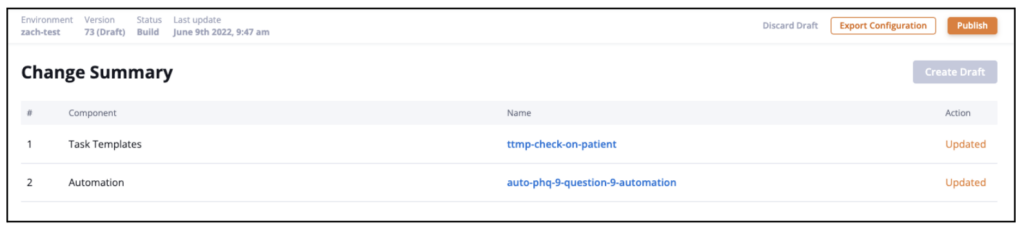
The Change Summary screen will update after each change – showing:
- The order in which changes were made
- Component or item that was changed
- Name of the item that was changed
- Action completed
Clicking on ‘Publish Draft’ will apply the changes shown in the Change Summary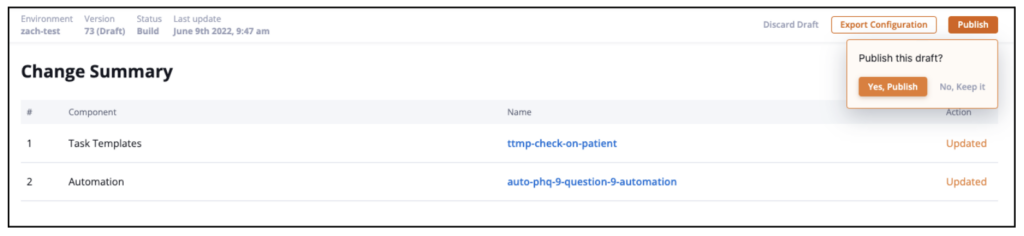
More Questions?
If you have any questions, please email the Customer Success Management team at CSM@welkinhealth.com or contact your Implementation/CSM directly.