Knowledge Base
Designer
Designer Overview
Designer Version History
Designer Automations
Designer Programs
Designer Profiles
Designer Patients
Designer Custom Data
Designer Visual Components
- Visual Components
- Visual Components & Dependencies
- Filtering With Message Template Variables
- Filtering With Message Template Variables
- How To Create an Assessment or Form Template
- How To Associate Assessments with Programs
- How to Add Assessments to a Template
- How to Configure Scored Assessments
- Create PDFs from Forms & Assessments
- Create Patient Facing Assessment (PFA) Folders
- Charts & Graphs: How to Configure
- Charts & Graphs: Filter, change date and by data point
- Forms: Conditional Logic
Designer Access Control
Designer Task Management
Designer Encounters
Designer Communications
Designer Terminology
Designer Help Page
Encounters: Dependencies
An encounter is a recorded interaction between a provider and a patient. During an encounter, providers often complete assessments to record patient issues and progress.
In the Care application, Encounters can be customized to include assessments which must be completed in order to finish an Encounter.
In this article, we will review how to:
- Create Encounter Templates
- Create Encounter Dispositions
- Create Assessments
In Designer – Scroll down the vertical purple menu bar until you see “Encounters”. Under this heading, you will see three categories: Encounter Templates, Encounter Dispositions, and Encounter Data Views.
Select “Encounter Templates” and “+New” to create a new Encounter Template
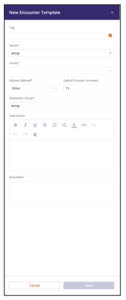 Enter a title for the encounter.
To select a color for this encounter (this will be reflected on the provider’s calendar), click on the orange dot. There will be six color options to choose from.
Select the relevant forms to be completed during this encounter (For more information regarding how to create Forms in Designer, please review the Welkin Health Knowledgebase)
Select the delivery method, whether this encounter will be in person, call, or video.
Select the default duration of the encounter (this will be reflected on the calendar and in the encounter information)
Add any relevant instructions and a description of this encounter.
Click “Save”
*** Reminder – in order to see this Encounter Type, go to security policies for each role that will need access to this encounter, select encounters, and add the relevant permissions to the encounter type that was just created, and click save.
Encounter Dispositions are optional fields that can be used to add more information to an Encounter, such as the outcome, billing code, or observational notes.
To create an Encounter Disposition, scroll down on the vertical menu bar on the left and select “Encounter Disposition”
Enter a title for the disposition field, and select the type of data that will be displayed.
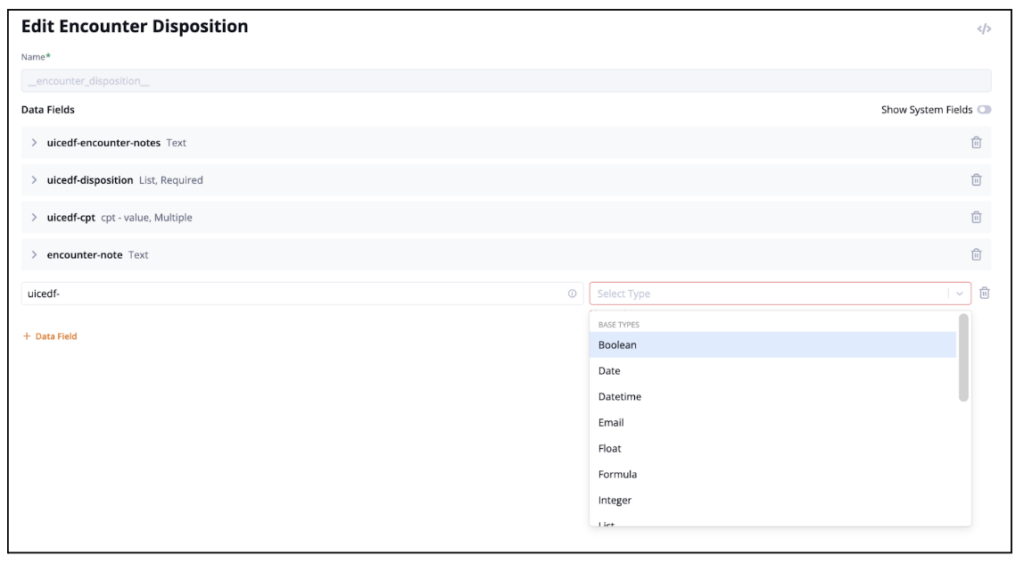
Click “Save” to add the encounter disposition field. Remember to update the Security Policies in the Internal Data Types area as well for any Encounter Dispositions.
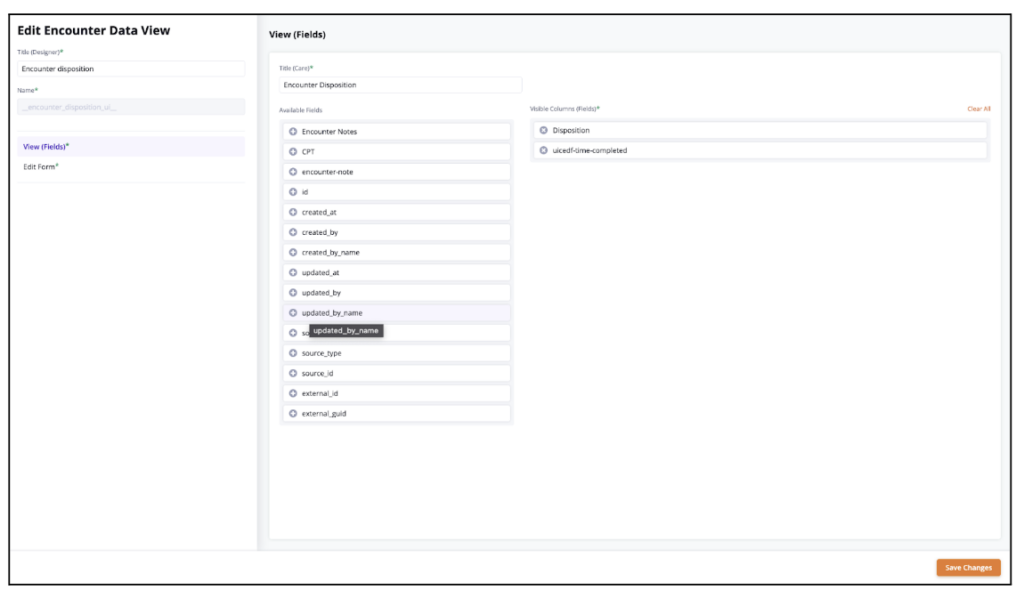
To add the encounter disposition to the encounter, it must be added to the Encounter Data View.
Scroll down on the vertical menu bar and select Encounter Data View.
In both the View (Fields) and Edit Form, drag the disposition field from the “Available Fields” column on the left to the “Visible Fields” column on the right. Click “Save” You can click on the field to also add a label if you would like.
To review how to add scoring to assessments – please review the article, “ Designer: How To – Configure: Scored Assessments”.
More Questions?
If you have any questions regarding Encounters & Dependencies, please visit the Welkin Health Knowledge Base or contact your Implementation/CSM for more information.