Knowledge Base
Designer
Designer Overview
Designer Version History
Designer Automations
Designer Programs
Designer Profiles
Designer Patients
Designer Custom Data
Designer Visual Components
- Visual Components
- Visual Components & Dependencies
- Filtering With Message Template Variables
- Filtering With Message Template Variables
- How To Create an Assessment or Form Template
- How To Associate Assessments with Programs
- How to Add Assessments to a Template
- How to Configure Scored Assessments
- Create PDFs from Forms & Assessments
- Create Patient Facing Assessment (PFA) Folders
- Charts & Graphs: How to Configure
- Charts & Graphs: Filter, change date and by data point
- Forms: Conditional Logic
Designer Access Control
Designer Task Management
Designer Encounters
Designer Communications
Designer Terminology
Designer Help Page
Custom Data Types (CDT): Designer
Custom Data Types (also known as CDTs) are user defined fields that are used to record information.
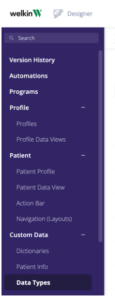
CDTs are built within Designer under the “Custom Data” > “Data Types” section
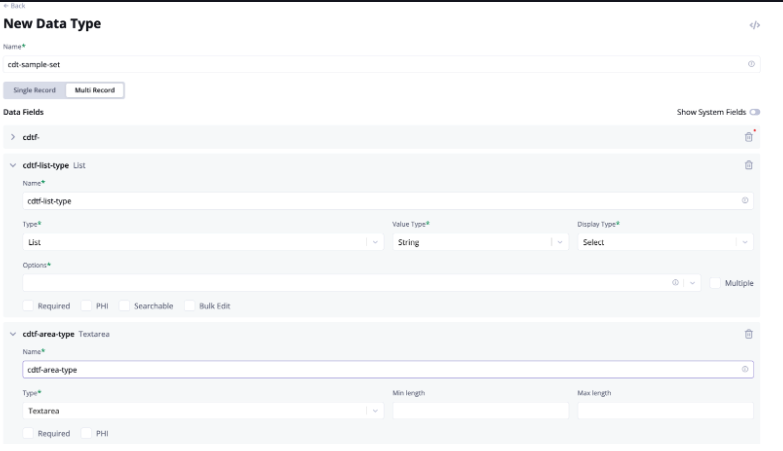
- Click on “+New” in the upper right corner to create a new CDT – Enter a name for the CDT (lower case, numbers,underscores or hyphens) Note. The system will automatically generate a prefix as defined in the Naming Conventions area that you can use, or remove).
- Create your data fields (cdtf)
- Name (same limits as the CDT)
- Type: (Standards like text, boolean, integer, as well as custom types, dictionary types, and profile types (explained in other articles)
- Select options (variable by data type)
- Enter Required status or PHI status, if needed
- Choose “+Data field” to create more cdtf items
Final tips:
When creating a CDT and associated cdtfs, think about how you will use them in your care plan. Any time you access a CDT
to complete a field or multiple fields in either a data view or an Assessment, you are writing to all of the cdtfs when you save changes. So in the case you create a CDT with 10 cdtfs and you only access and write to two of them in an Assessment, you will actually, when saving that assessment, be also writing 8 blank/null values to the other cdtfs that were not referenced. This could cause display issues or data inconsistency. Please feel free to speak to the Implementation/CSM team at Welkin to assist with specific cases and recommendations. Also, always remember to update Security Policies when creating new CDTs.
More Questions?
If you have any questions, please visit the Welkin Health Knowledge-Base or contact your Implementation/CSM for more information.