Knowledge Base
Designer
Designer Overview
Designer Version History
Designer Automations
Designer Programs
Designer Profiles
Designer Patients
Designer Custom Data
Designer Visual Components
- Visual Components
- Visual Components & Dependencies
- Filtering With Message Template Variables
- Filtering With Message Template Variables
- How To Create an Assessment or Form Template
- How To Associate Assessments with Programs
- How to Add Assessments to a Template
- How to Configure Scored Assessments
- Create PDFs from Forms & Assessments
- Create Patient Facing Assessment (PFA) Folders
- Charts & Graphs: How to Configure
- Charts & Graphs: Filter, change date and by data point
- Forms: Conditional Logic
Designer Access Control
Designer Task Management
Designer Encounters
Designer Communications
Designer Terminology
Designer Help Page
Document Types: How To Configure
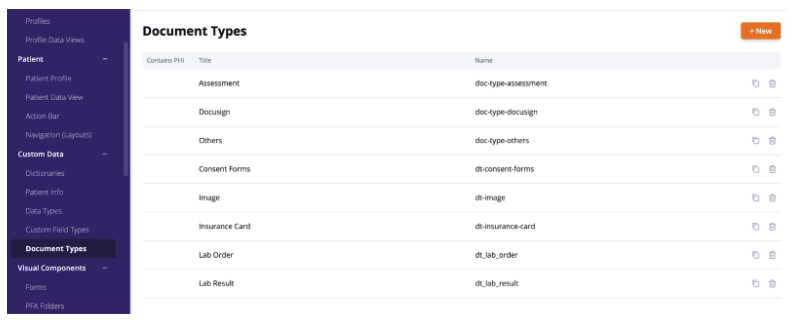
Document Types are developed to help categorize and name documents that are uploaded into the patient’s chart. Configuring document types helps reduce the amount of time to search for uploaded documents in the Care portal.
Follow these steps to create your Document Types:
- In the Designer portal “Create Draft”
- On the left side menu bar you will navigate to Document Types under Custom Data
- Select “+ New”
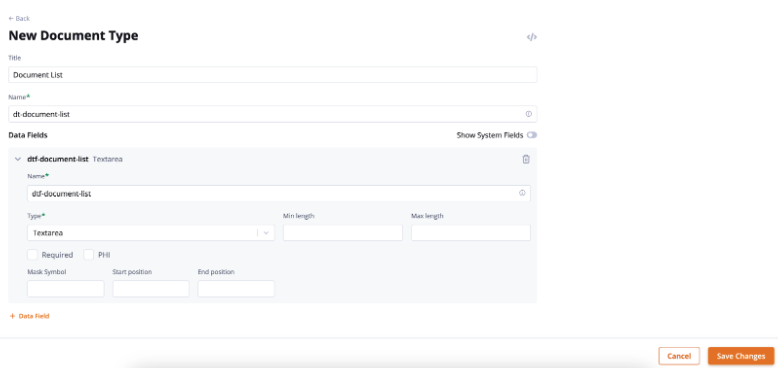
- Enter a Title: This is the Title name that will appear in Care
- Name: This will automatically populate when you enter Title, but can be changed manually if desired.
- Data Field: This is where you can add additional fields. Examples include: Text area for notes or List for sub categorizations
- Save Changes

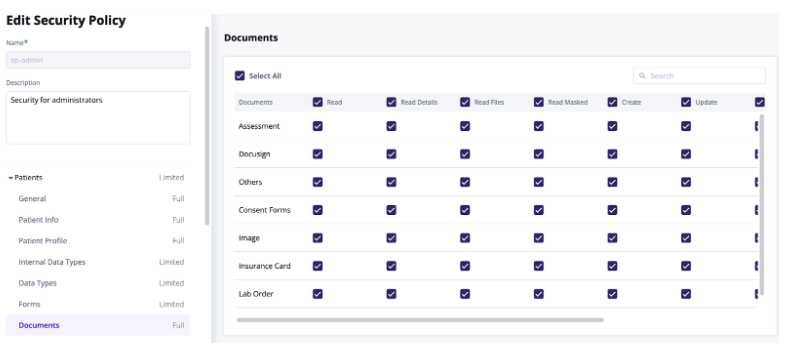
- On the left sidemenu bar you will navigate to Security Policies under Access Control. In order to view the new Document Type you will need to grant Document permissions in the appropriate Security Policies.
- Select Change Summary and Publish.

More Questions?
If you have any questions, please visit the Welkin Health Knowledge-Base or contact your Implementation/CSM for more information.