Knowledge Base
Care
Care Overview
Care Home
Care Calendar
Care Patients
- Patients
- Patient Profile
- Patient Profile
- Patient Profile: Editing Patient Information
- My Patients: Create and Search
- My Patients and Bulk Edits/Actions
- Patient Care Teams
- Patient Programs and Phases
- Goals
- Forms and Assessments
- Creating Forms and Assessments
- Charts & Graphs
- Document Management
- Documents: Uploading
- Data Views
Care Encounters
Care Communications
Care Profiles
Creating a Message Template
Message Templates are available for: Email, SMS, Chat, and Whatsapp message types. Message Templates are prebuilt messages that can be sent manually or through an automation.
In order to create Message Templates you must log into Welkin’s Designer. Once you have created a Draft you will find the “Message Template” on the left option list under Communication. Select +New in the top right and you will be brought to the New Message Template view.
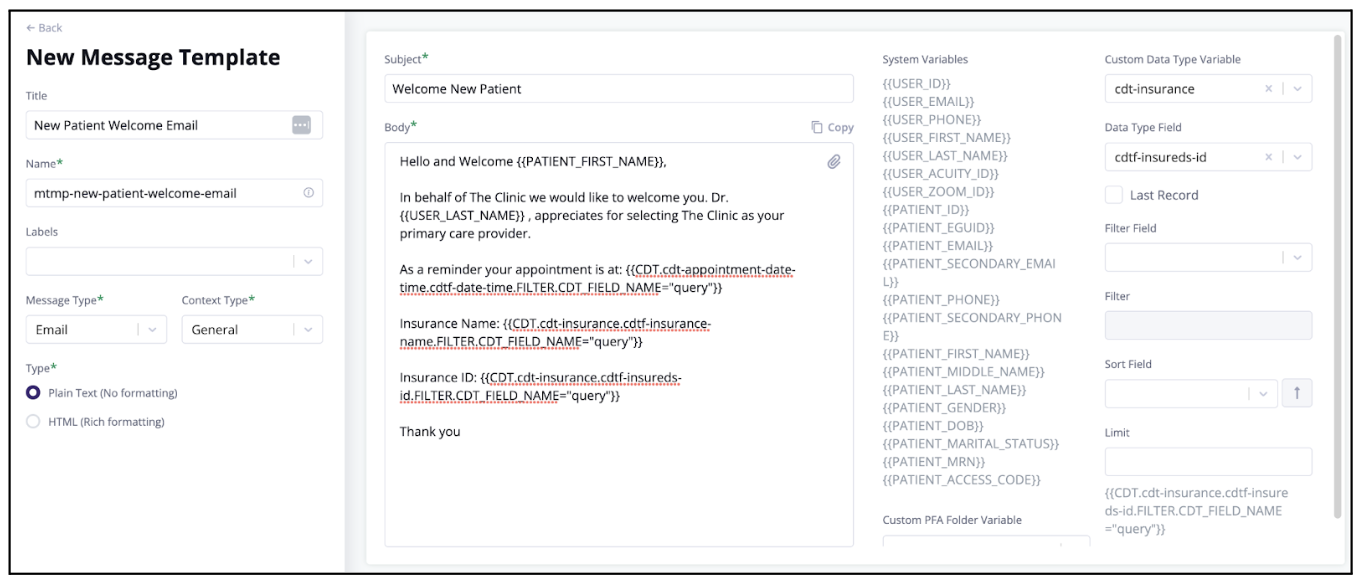
On the left side toolbar you will need to add a Title/Name and then select the Message Type. When selecting a Message Type the format of the message will adjust in the center, Email vs SMS.
In the center is where you will enter the message. On the right side is where you can utilize the System Variables to pre-fill information tied to either the User or Patient. To use the System Variables, simply hover and select the System Variable and paste into the message. In addition Welkin allows you to include any Custom Data Types that have been created to be added into the message as a Custom Data Type Variable. Select the Custom Data Type from the top drop down and narrow this further by selecting the Data Type Field drop down. Once completed your selection the Variable will automatically appear at the bottom right hand corner to copy and paste into the message. In addition, the Message Templates feature allows for attachments and also, to include PFA links for patients to complete an Assessment or Form. Once completed select Save Changes and Publish.
More Questions?
If you have any questions, please email the Customer Success Management team at CSM@welkinhealth.com or contact your Implementation/CSM directly.