Knowledge Base
Designer
Designer Overview
Designer Version History
Designer Automations
Designer Programs
Designer Profiles
Designer Patients
Designer Custom Data
Designer Visual Components
- Visual Components
- Visual Components & Dependencies
- Filtering With Message Template Variables
- Filtering With Message Template Variables
- How To Create an Assessment or Form Template
- How To Associate Assessments with Programs
- How to Add Assessments to a Template
- How to Configure Scored Assessments
- Create PDFs from Forms & Assessments
- Create Patient Facing Assessment (PFA) Folders
- Charts & Graphs: How to Configure
- Charts & Graphs: Filter, change date and by data point
- Forms: Conditional Logic
Designer Access Control
Designer Task Management
Designer Encounters
Designer Communications
Designer Terminology
Designer Help Page
Opt Out Patients from SMS Communications
Through Designer, you can create a workflow to opt-out your patients from SMS communications. There are a few items you need before you can complete this build:
- Define your opt-out keyword. In our example, we will use the keyword “STOP”
- Create an SMS message template to confirm Opt-out status
- Create a CDT list/boolean field with values for “SMS – Yes” and “SMS – No” (or similar) that will be changed by the care team when processing the opt-out
- Create a Data View for the CDT, apply permissions, and place on a layout
- Create a Task template for the care team to process the opt-out
To create the workflow in Welkin Designer, take the following steps:
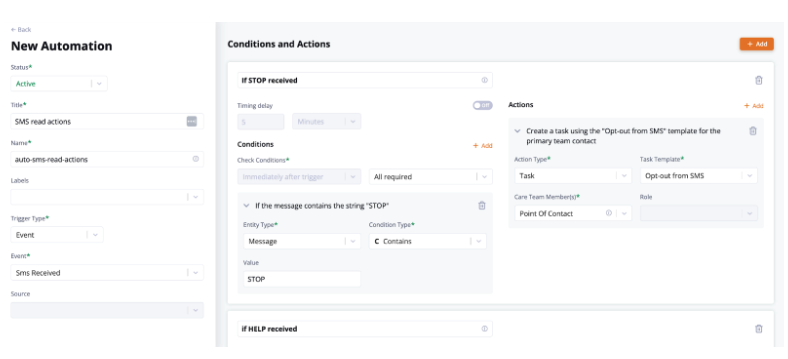
- Navigate to “Automations” and select “+New” to create a new automation
- Name and label your automation as desired, and select Trigger Type “Event” and Event “SMS Received”
- Name your Condition and Action box as desired
- In the Conditions area, select Event Type “Message” and “Contains”, using the value for your Opt-Out as the condition (“STOP” in our example)
- Add an action type of Task for the care team user who you want to process the SMS opt-out, and select the task template you already created (items C and E above)
- You can optionally also create a message that auto sends to the patient when either the opt-out is received, or when the opt-out is processed
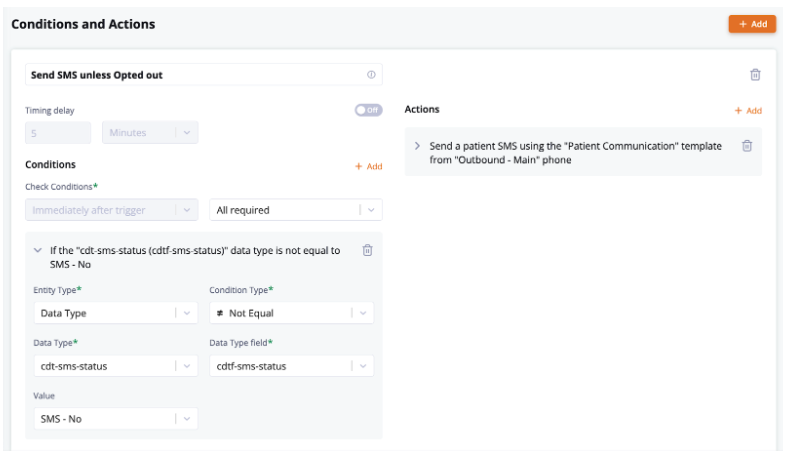
Next, in any Automation where you send an SMS to a patient, you want to add the following condition
- Data Type condition check, for the same data type created in C above
- Condition “Not equal” to your opt-out language (“SMS – No” in our example).
Logically, whenever an automation is preparing to send an SMS, it will check this condition first and if the field is marked “No,” the SMS will not be sent.
Tips:
- This same logic can be used to automate a task or alert the care team if a patient sends an SMS using your HELP or any other keyword
- Your task can also have the team remove the SMS capability from the patient’s phone number instead of having them change a CDT field and using the opt-out condition check. This would prevent all SMS, even those attempted manually
More Questions?
If you have any further questions, please visit the Welkin Health Knowledge-Base or contact your Implementation/CSM for more information.