Knowledge Base
Designer
Designer Overview
Designer Version History
Designer Automations
Designer Programs
Designer Profiles
Designer Patients
Designer Custom Data
Designer Visual Components
- Visual Components
- Visual Components & Dependencies
- Filtering With Message Template Variables
- Filtering With Message Template Variables
- How To Create an Assessment or Form Template
- How To Associate Assessments with Programs
- How to Add Assessments to a Template
- How to Configure Scored Assessments
- Create PDFs from Forms & Assessments
- Create Patient Facing Assessment (PFA) Folders
- Charts & Graphs: How to Configure
- Charts & Graphs: Filter, change date and by data point
- Forms: Conditional Logic
Designer Access Control
Designer Task Management
Designer Encounters
Designer Communications
Designer Terminology
Designer Help Page
Designer: How to Create Automations
Automations enable you to instantly trigger another action based on predefined conditions.
To set up an automation, select “Automations” from the vertical menu bar in Designer.
Click on “+New” in the upper right corner
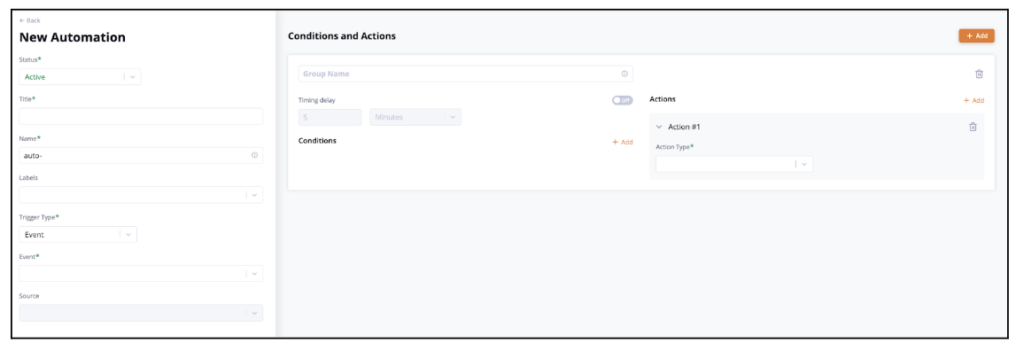
Enter a title for your automation.
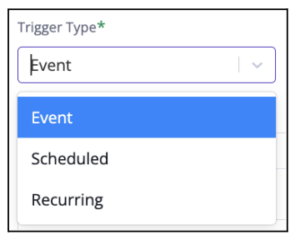
Next, select a Trigger Type: Event, Scheduled, or Recurring
Note: When you select a general trigger category with multiple options below, that trigger will fire when any of the below actions occur. For example, selecting “Data Type” will trigger for all of “Data Type Created, Data Type Updated, and Data Type Deleted.”
Based on the Trigger Type selected, you will receive different options. For example, when selecting the “Event” Trigger Type, you select an event type from a drop-down which will appear.
Based on the Event selected, you will again be presented with different options.
For example, to create an automation that sends a notification when a new patient has been created.
Select the Trigger Type of Event. Under the event drop 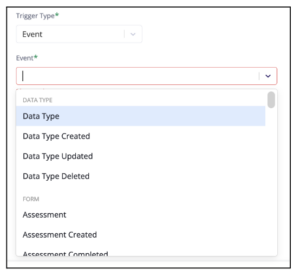 down, scroll down to the ‘Patient’ heading and select ‘Patient Created’. Now that the Trigger Type and Event have been selected, we can now move on to the action. In the action drop down (located on the right hand side of the screen) scroll down to the ‘User’ heading, and select notification. Enter a message for the notification in the ‘Body’ section and select which users should receive the notification.
Next, we will look at actions based on the Trigger and Event Type.
On the right side of the screen are Conditions and Actions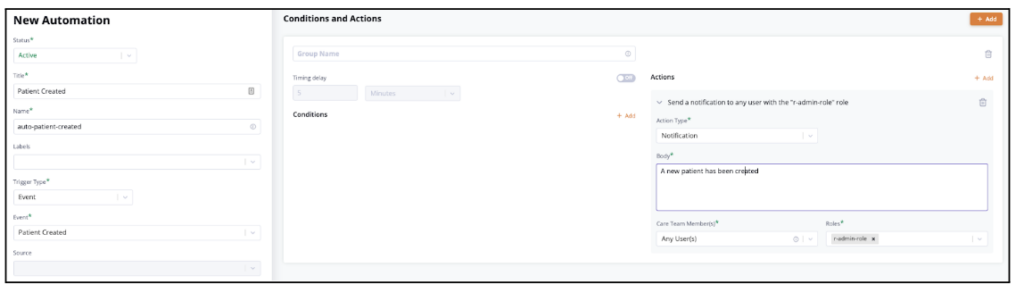
There can be multiple conditions and actions based upon one triggering event, click ”+Add” to create multiple conditions or actions.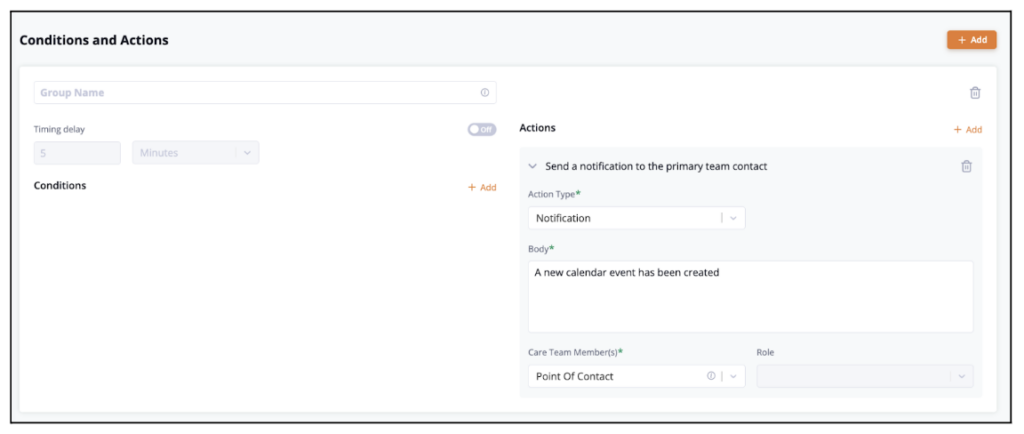
To continue with the example of notifying the primary point of contact of a new appointment, select the action type of, “notification”.
Add a message to the body of notification.
Finally, select who should receive the notification
Next, we will review Conditions.
Conditions indicate that the automation should only be triggered if specified conditions are present.
Click on “+Add” next to Conditions to add a condition
Like Actions, you can have multiple conditions by clicking on “+Add”, you can make all or only one condition required to trigger the corresponding action.
Select an Entity Type: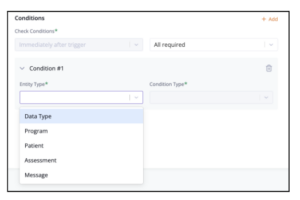
- Data Type
- Program
- Patient
- Assessment
- Message
Next, select a condition type. This will vary based on the Entity Type selected.
Other fields will appear based on the entity type. Select the corresponding fields based on the conditions you would like your automation to adhere to.
A timing delay can be configured to trigger the action after a specified amount of time. Toggle on the timing delay button and enter the numeric value and time frame for which the delay should be set.
When completed, select “Save Changes”
Due to the nature of automations, there could be limitless amounts of combinations. Welkin recommends testing automations in your sandbox environment to see that they produce the desired results.
More Questions?
If you have any questions regarding Automations , please visit the Welkin Health Knowledge Base or contact your Implementation/CSM for more information.