Knowledge Base
Designer
Designer Overview
Designer Version History
Designer Automations
Designer Programs
Designer Profiles
Designer Patients
Designer Custom Data
Designer Visual Components
- Visual Components
- Visual Components & Dependencies
- Filtering With Message Template Variables
- Filtering With Message Template Variables
- How To Create an Assessment or Form Template
- How To Associate Assessments with Programs
- How to Add Assessments to a Template
- How to Configure Scored Assessments
- Create PDFs from Forms & Assessments
- Create Patient Facing Assessment (PFA) Folders
- Charts & Graphs: How to Configure
- Charts & Graphs: Filter, change date and by data point
- Forms: Conditional Logic
Designer Access Control
Designer Task Management
Designer Encounters
Designer Communications
Designer Terminology
Designer Help Page
Configuring Security Policies
Security Policies are groups of assigned privileges that are assigned to the care team and govern the user’s interaction with data in Care. For example, a system administrator policy may have view, edit, and delete access to every menu, patient, and encounter item within Care – while another policy may only have the security rights to view patient information.
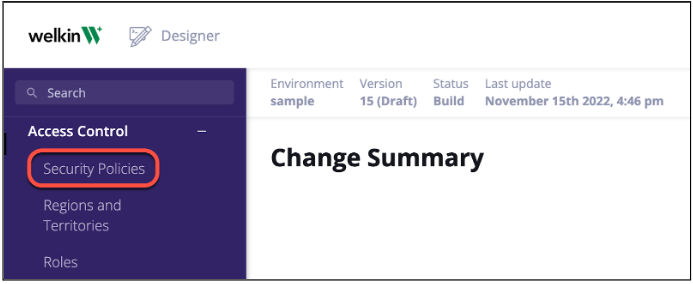
Security Policies are a sub-menu item in the vertical bar on the left side of Designer under the ‘Access Control’ menu.
Click on either the copy button for an existing policy, or ‘New’ on the right side of the screen. Utilizing the copy button allows you to create a new policy from an existing one
.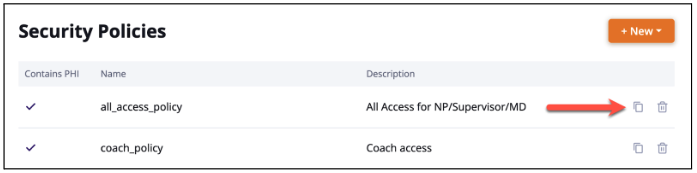
If selecting ‘‘New’ , the user will then either select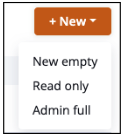 “New empty”, “Read only”, or “Admin full”.
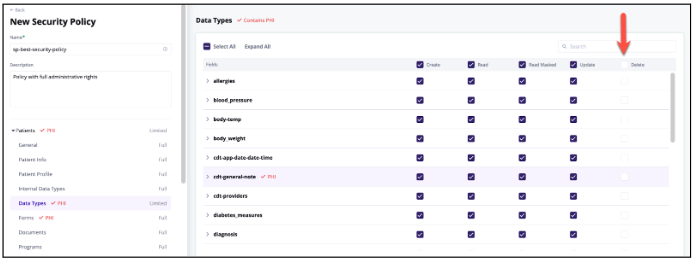
“New empty” is a policy where there are not any rights currently configured. As can be seen in the below screen-shot, the policies on the left have ‘No’ next to them. The rights under the “General” listing for ‘Create’, ‘Read’, ‘Update’, and ‘Delete’ are empty. The “New Empty” policy allows a user to create a policy without any security rights being pre-selected.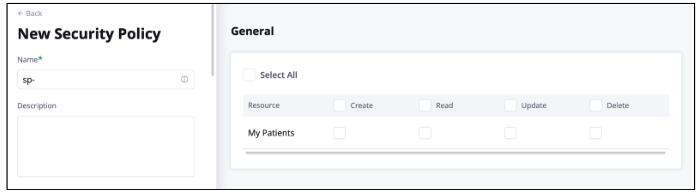
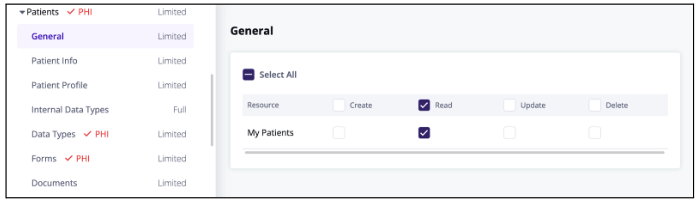
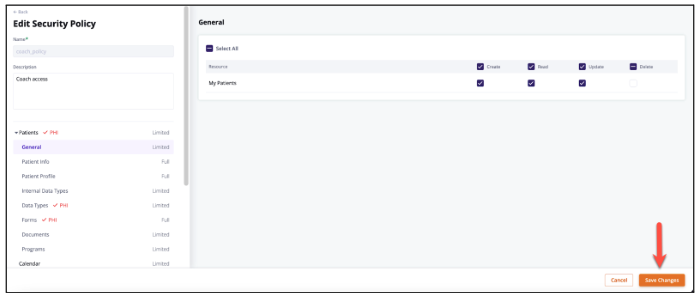
“Read Only” is a pre-configured policy in which the user will only have ‘read only’ access to Care. As can be seen below, The majority of the items in the left side menu column have ‘Limited’ access, while “My Patients” under the “General” heading only has ‘Read’ selected.
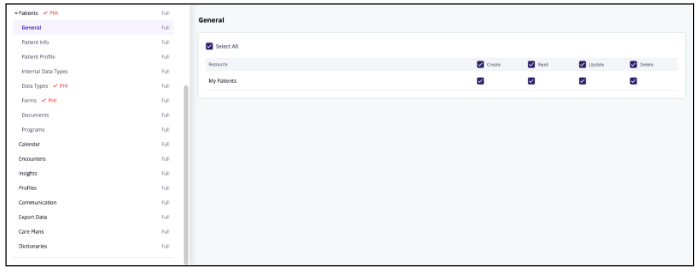
“Admin Full” is a pre-configured policy in which the user will have read/write access to Care. Each of these pre-configured policies can be modified based on the policy being created.
NOTE: The pre-configured policies, including “Admin Full’ are not dynamic. As new CDTs, forms, etc. are created in Designer the policies’ will need updated.
When adding a policy, create a name and add a description*. The name has to be lower case letters, numbers, underscores, or hyphens. Clicking the space bar will automatically add a hyphen to the name.
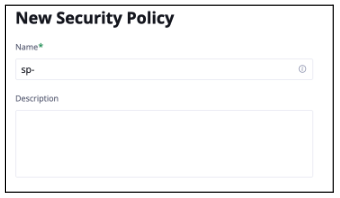
*Best practice is to add a description of the policy’s purpose, although it is not a mandatory field.
Click on the policy boxes for each ‘Resource’ or ‘Field’ to indicate if the policy will have the right or not to perform the listed action.
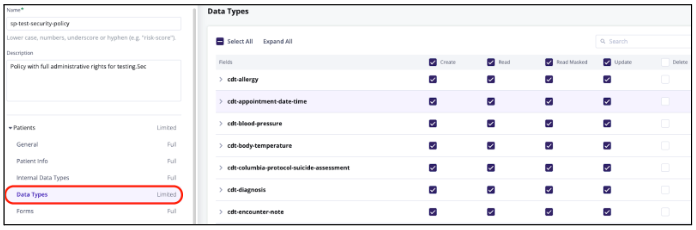
Click on a policy category in the left-side vertical menu.
To make a mass change to every box under a category, click the box at the top. The below print-screen shows the user(s) assigned to the policy will not be able to delete any of the shown fields since the boxes are empty.
Click “Save” at the bottom right of the screen once all actions have been configured appropriately.
After creating a policy(ies) it will need added to a role. Click here to learn more about creating Roles in Designer.
More Questions?
If you have any questions, please email the Customer Success Management team at CSM@welkinhealth.com or contact your Implementation/CSM directly.