Knowledge Base
Designer
Designer Overview
Designer Version History
Designer Automations
Designer Programs
Designer Profiles
Designer Patients
Designer Custom Data
Designer Visual Components
- Visual Components
- Visual Components & Dependencies
- Filtering With Message Template Variables
- Filtering With Message Template Variables
- How To Create an Assessment or Form Template
- How To Associate Assessments with Programs
- How to Add Assessments to a Template
- How to Configure Scored Assessments
- Create PDFs from Forms & Assessments
- Create Patient Facing Assessment (PFA) Folders
- Charts & Graphs: How to Configure
- Charts & Graphs: Filter, change date and by data point
- Forms: Conditional Logic
Designer Access Control
Designer Task Management
Designer Encounters
Designer Communications
Designer Terminology
Designer Help Page
Create Formulaic Custom Data Type Fields
Mathematical expressions can be utilized within a Custom Data Type Field (CDTF) to document answers derived from two or more fields. They can be used to calculate, or to combine multiple string values into one. The CDTFs can be associated with multiple Data Views, Assessments, and Charts and Graphs.
The first step to creating a formulaic CDTF is to create the Custom Data Type (CDT). To learn about creating CDTs, follow this link: Designer: Feature Overview – Custom Data Types. Next, click “+ Data Field” to create a CDTF.
There are several ways to record values in a field. One is to set the Type to “List”. To assign numerical values to each answer set the Value Type = ‘Integer’ or ‘Float’. For example, using ‘Yes’ and ‘No’ as the options and having ‘Yes’ equal 2 points and ‘No’ equal 1, set type = “Integer” then in the “Options field” type: “2::Yes” (hit the Enter key) “1::No” (hit the Enter key). Another way to store numerical values is to set the Type as “Integer” or “Float” and then assign a Min value and Max value.
If you’re combining string values from a list in your formula, use only the strings ‘Yes’ and ‘No’ in your list. Finally, you can combine Text and Textarea fields too.
Once the fields are created, the last step will be to create the field calculating the mathematical expression. The field’s Type will be set to “Formula”. For calculations, set the Value Type to “Integer” (if using whole numbers) or “Float”, and for string values set to ‘String’. By clicking the “+ Variables” button, the field variables, or CDTF names, for each of the CDTFs can be copied and pasted into the Formula box. The ‘Help’ section of the “+ Variables” box lists the allowed operators used between the CDTF names to create mathematical formulas.
The following example shows two fields, cdtf-q2 and cdtf-q3, with “yes” and “no” options that have some assigned value to them.
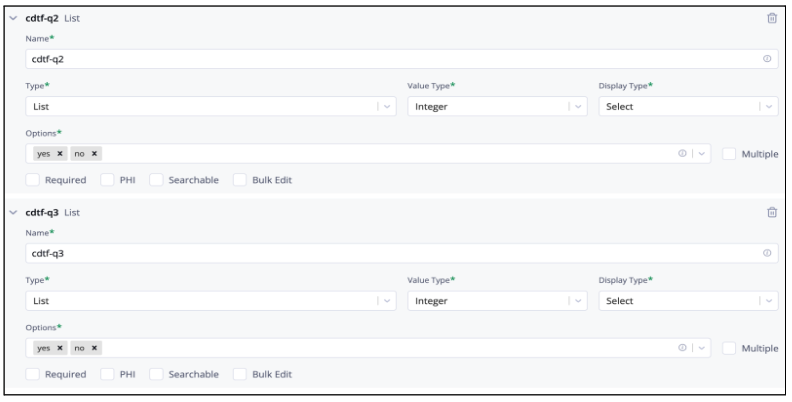
The cdtf-scoring-field’s formula is “{{cdtf-q2}} + {{cdtf-q3}}”. This indicates the value of the answer recorded in cdtf-q2 will be added to the value of the answer recorded in cdtf-3 to then create the numerical value that will appear in cdtf-scoring-field.

More Questions?
If you have any questions regarding Automations , please visit the Welkin Health Knowledge-Base or contact your Implementation/CSM for more information.