Knowledge Base
Integrations
Integration Overview
Integration Information
- Acuity Set up
- eRX: Implementation Checklist
- eRx: Overview
- eRx: Setup and Configuration
- eRX: IDP Quick Tips
- eRX: Tokens
- eRX: Completing the EPCS invitation and Logistical Access Control
- eRX: How to Reset the EPCS Passphrase
- eRX: Prescribe Tapered, Titrated, & Variable Dose Medications
- eRX: Reporting
- Labs: Overview
- Labs: Setup and Configuration
- Labs: Creating a Lab Order in Health Gorilla
- Labs: Creating a Quick Order Lab in Health Gorilla
- DocuSign: Implementation Checklist
- DocuSign: Authorization
- DocuSign: Setup and Configuration in Admin
- DocuSign: Setup and Configuration in Designer
- DocuSign: Feature Overview in Care
- DocuSign: Feature Overview in Designer
- DocuSign: Creating Templates
- Docusign: Go Live Process
- eSignature Configuration
- Zoom: Setup and Configuration
- Zoom: How to Configure Zoom in Designer
- Zoom: Where Do I Find My Zoom ID?
- Zoom: Setting Up Waiting Rooms
- Sisense: Change Requests
- Paubox: Setup and Functionality
- Google Calendar Integration
- Welkin Calendar Synchronization App
- Stripe: Setup and Configuration
- Candid: Setup and Configuration
- Candid Integration - Required Fields
- Pre-authorization
- Phone Tree Implementation
- Twilio: A2P Questions & Answers
- SSO Setup
- Configuring Google Single Sign On
- OneLogin: Setup and Configuration
Integration Support
DocuSign: Setup and Configuration in Admin
Customers can integrate their DocuSign account within Welkin. The DocuSign integration supports in person signing and the ability to send to patients for remote signing. Once signed, the DocuSign document is saved in Welkin’s Document Management.
Docusign Configuration
To start using e-signing within Welkin, we need to complete the following 3 steps:
- Step 1: Admin Portal Configuration
- Step 2: Designer Portal Configuration
- Step 3: Authorization
In this article, we’ll cover Step 1. You can then click through to the other two links to continue the setup.
Initially, this configuration will be done using the Developer Docusign account of the customer. Once the Go-live process is completed, the above 3 steps must be done once again with the Production Docusign account of the customer, with minor changes specified in each step itself.
Note: The Docusign account’s name, email, and associated company name will all be patient facing. So it is suggested to use a common email rather than a person specific email. For example – if the customer name is Profilio, the Docusign user account can be named something like “Profilio DocuSign”, with the email docusign@profilio.com or support@profilio.com.
Admin Portal Configuration
Log in to Welkin’s Admin portal at https://admin.live.welkincloud.io and select from the left hand vertical menu Integrations > Docusign.
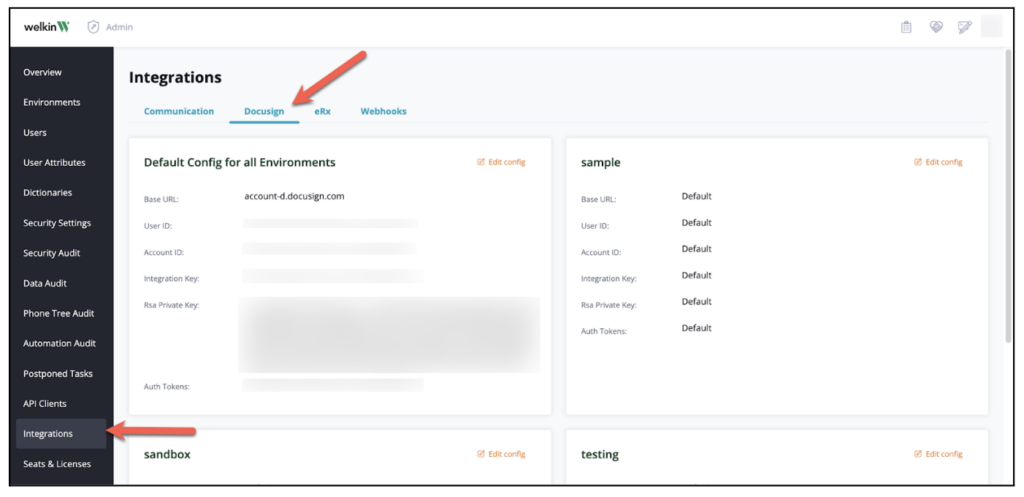
Here we can set up a common configuration for all instances under Default Config. We can also configure Docusign for each instance separately under Instance Configs. Instance configuration is given priority over default configuration if both are populated. If the configuration is empty for any instance, then the default configuration is used.
Docusign configuration in Admin portal requires the following 6 values:
- Base URL: development value is account-d.docusign.com before the Go-Live process and production value is account.docusign.com after the Go-Live process is completed. Note: do not use na4.docusign.com or similar. Use the values as written here, no “https://”.
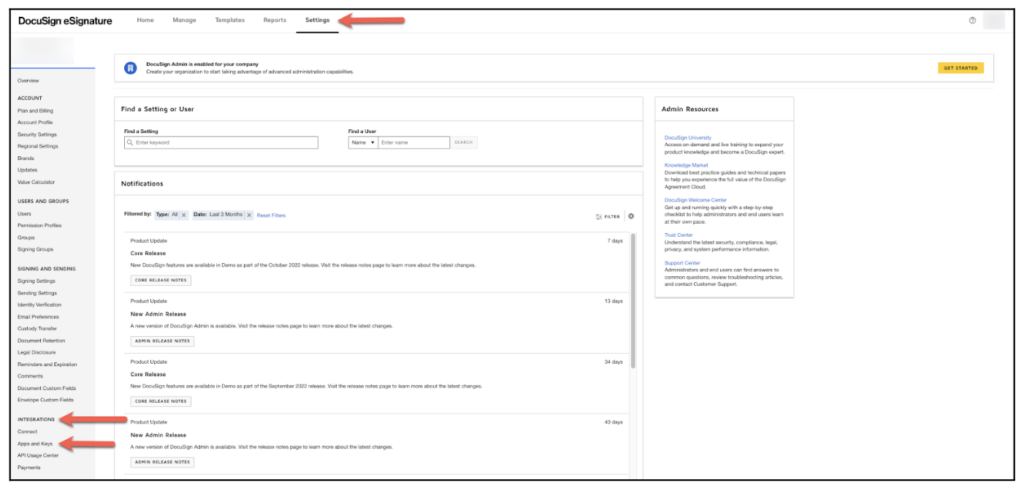
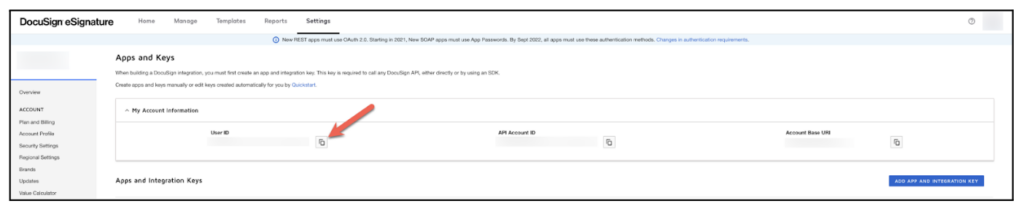
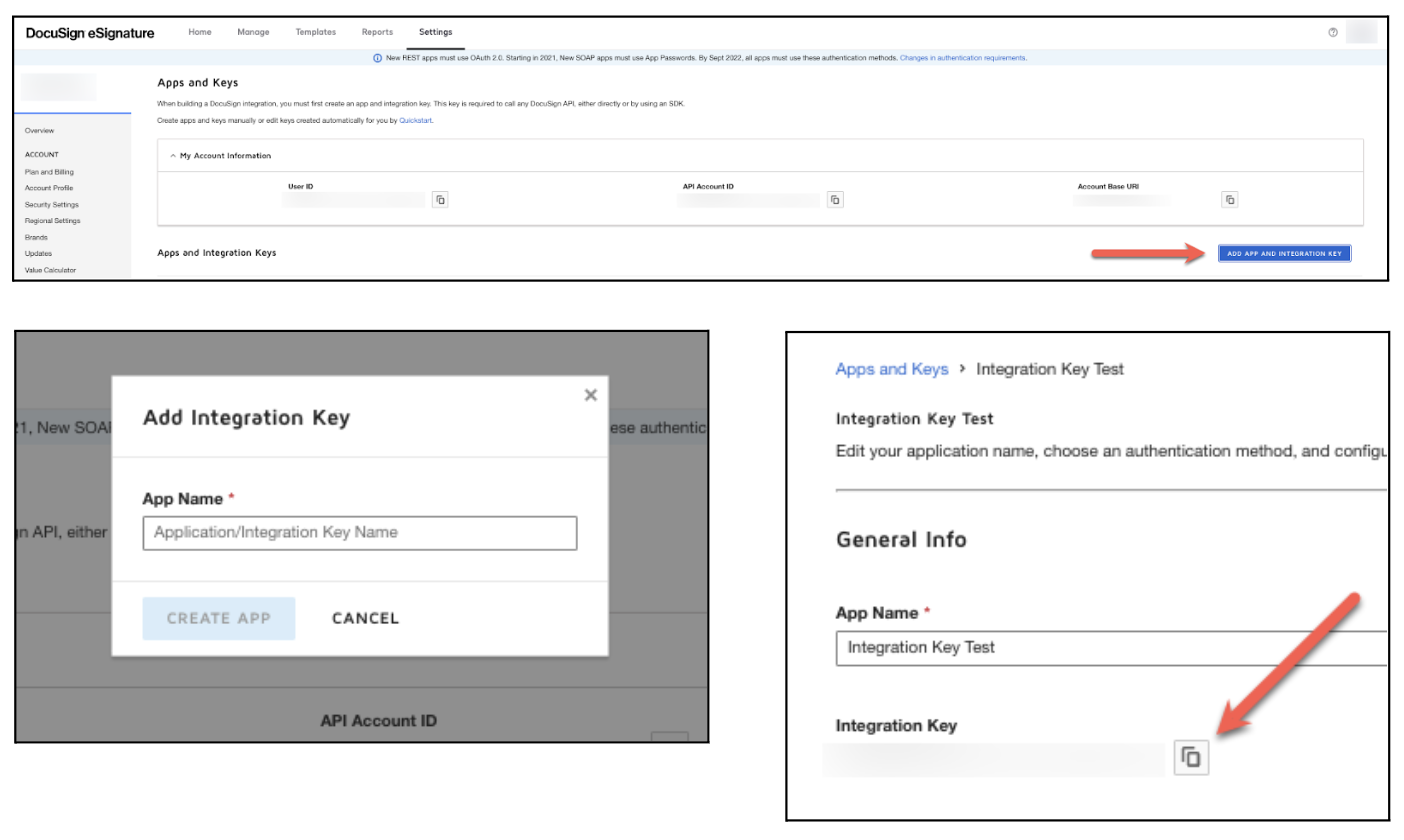
- API Username (User ID) : Go to Settings > Integrations (in left panel) > Apps and Keys. Copy API Username (a.k.a. userId) and API Account ID

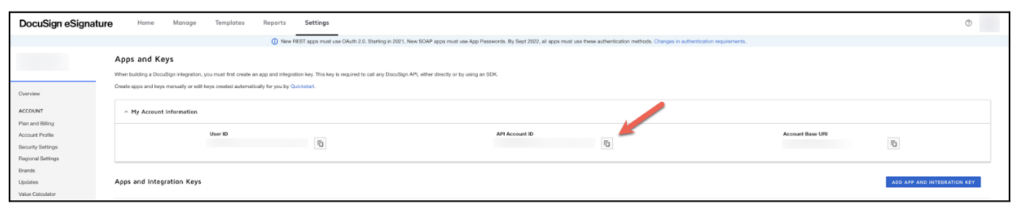

- API Account ID (Account ID):

- Integration Key: Click on Add App and Integration Key, Enter an App name and click Create App, a page will open where the integration key can be copied *(*Do not navigate away from this page on the tab where you logged into your DocuSign Developer account; step 6 requires you to generate an RSA key – which is located further down on this document)

- Auth Token: In the Welkin Admin portal, navigate the Integrations > Docusign, Edit the configuration for the instance where DocuSign is being used, click on the Generate Token button and a 36 digit token (a GUID) will be generated
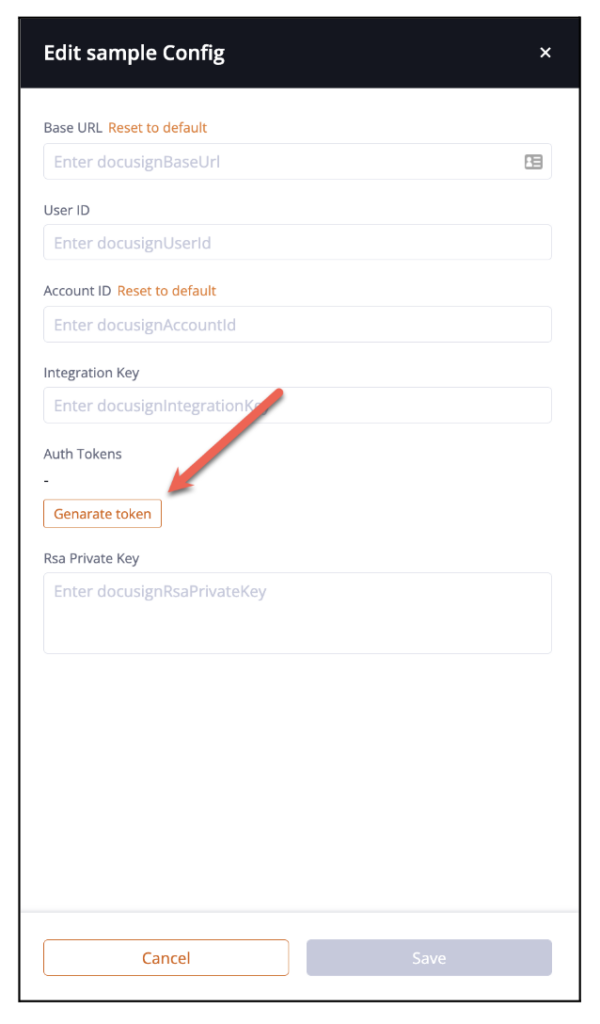

- RSA Private Key (Private Key): Note: Include “—-BEGIN RSA PRIVATE KEY—-” and “—–END RSA PRIVATE KEY—-” and all content between these. If this has an error, check the formatting (if you pasted in from some other program)
On the same page as the Integration Key click on the Generate RSA button.
A new window will open – copy the Private Key (which is below the Public Key) Enter all information into the Welkin Admin configuration and click Save. A message will be displayed at the top right of your screen that will read ‘Environment has been updated’.
API Username, API Account ID, Integration Key and RSA Private Key can be obtained from Docusign Account.
Login to Docusign Developer account – https://account-d.docusign.com. If the Go-Live process is completed, then login to Docusign Production account instead – https://account.docusign.com. Once logged in, please follow these steps:
To obtain API Username & API Account ID
- Go to Settings > Integrations (in left panel) > Apps and Keys
- Copy API Username (a.k.a. userId) and API Account ID
To obtain Integration Key & Private Key
- After obtaining the above 2 values, create an app in Docusign (skip this step for Production Account, proceed to next step).
App creation can only be done in the Developer Account. In the production account, once the Go-Live process is completed, the app will be already listed.
- In the app creation form do the following (if using Production account, simply edit the existing app and it will open a similar form):
- Copy the Integration Key (a.k.a. clientId)
- Under Service Integration, generate RSA key pair & copy the value of private key
Screenshot 4: Obtaining private key
- Under Additional Settings > Redirect URIs field, add the URI of the care portal sign in page – https://care.live.welkincloud.io/signin. This will be needed in the authorization step later.
- Save the form.
Now that we have obtained all 4 values, enter these in the Admin portal along with Auth Token and Base URL and save the configuration. Configuration for Admin Portal is complete.
More Questions? For a more comprehensive setup and configuration document, please download this PDF.
If you have any questions regarding the DocuSign Integration or its implementation, please visit the Welkin Health Knowledge Base or contact your Implementation/CSM for more information.