Knowledge Base
Integrations
Integration Overview
Integration Information
- Acuity Set up
- eRX: Implementation Checklist
- eRx: Overview
- eRx: Setup and Configuration
- eRX: IDP Quick Tips
- eRX: Tokens
- eRX: Completing the EPCS invitation and Logistical Access Control
- eRX: How to Reset the EPCS Passphrase
- eRX: Prescribe Tapered, Titrated, & Variable Dose Medications
- eRX: Reporting
- Labs: Overview
- Labs: Setup and Configuration
- Labs: Creating a Lab Order in Health Gorilla
- Labs: Creating a Quick Order Lab in Health Gorilla
- DocuSign: Implementation Checklist
- DocuSign: Authorization
- DocuSign: Setup and Configuration in Admin
- DocuSign: Setup and Configuration in Designer
- DocuSign: Feature Overview in Care
- DocuSign: Feature Overview in Designer
- DocuSign: Creating Templates
- Docusign: Go Live Process
- eSignature Configuration
- Zoom: Setup and Configuration
- Zoom: How to Configure Zoom in Designer
- Zoom: Where Do I Find My Zoom ID?
- Zoom: Setting Up Waiting Rooms
- Sisense: Change Requests
- Paubox: Setup and Functionality
- Google Calendar Integration
- Welkin Calendar Synchronization App
- Stripe: Setup and Configuration
- Candid: Setup and Configuration
- Candid Integration - Required Fields
- Pre-authorization
- Phone Tree Implementation
- Twilio: A2P Questions & Answers
- SSO Setup
- Configuring Google Single Sign On
- OneLogin: Setup and Configuration
Integration Support
Labs: Creating a Lab Order in Health Gorilla
Submitting a lab order in Health Gorilla starts by accessing the patient profile in Welkin and selecting the SSO button.
This can be found within the top info under the patient’s demographic information, and appears as a beaker icon. Click on this button to continue.
Next, Welkin will redirect you to different options of where you can navigate to in Health Gorilla. Select the Place New Order button to start entering the lab order information for this patient.
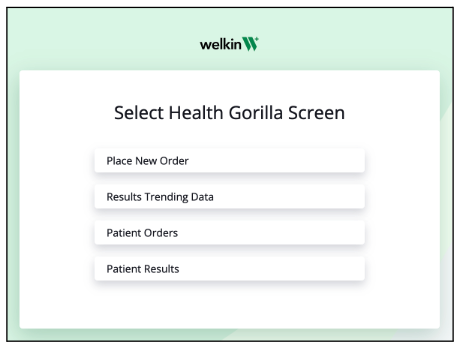 The lab ordering workflow has now been initiated within the Health Gorilla UI for this patient.
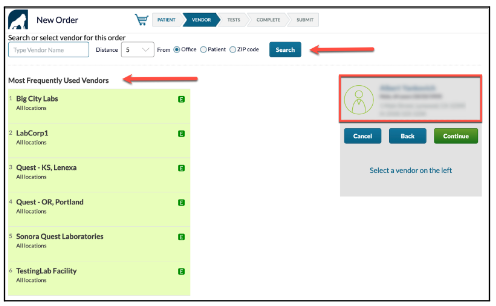
The patient demographic information can be seen within the gray box on the right hand side of the screen (outlined in red in the image to the right).
Select the lab vendor that the patient will have their orders taken.
This can be accomplished by doing a lab vendor search at the top of the screen. The search can be completed by entering the vendor name, and selecting the distance from an office, patient address, or specific zip code.
Alternatively, you can select from the Most frequently Used Vendors. This list is automatically generated based on where labs are most typically sent to.
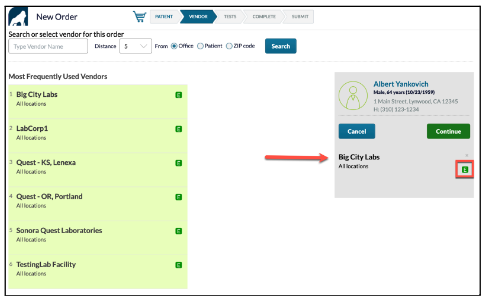 Once the vendor is selected, the lab name will appear under the patient demographic information within the gray box on the right hand side of the screen.
A green “E” will appear next to the lab to indicate that the lab is electronically connected. This means that the lab order can be electronically sent. If the green “E” icon does not appear, the order requisition will need to be faxed (which requires an e-fax number) or the order requisition can be printed and provided to the patient. Click on Continue to move to the next step in the ordering workflow.
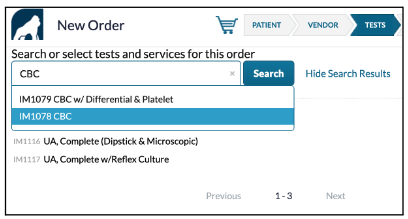 Select the tests by completing a search (either by code or by entering text related to the test code)
Alternatively, select the tests listed on the left hand side of the screen. Once a test has been selected, the tests will show under the patient demographic information (as shown in image below outlined in red)
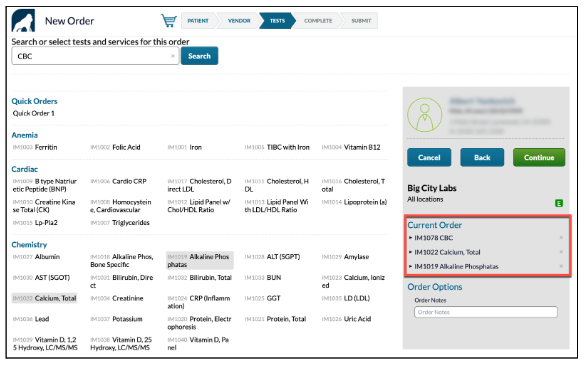
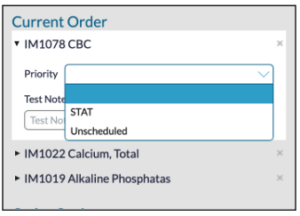
By clicking on the drop down arrow next to each test, you are able to enter a priority level and any additional notes that you wish to submit with the order.
Click on Continue to move to the next step in the ordering workflow.
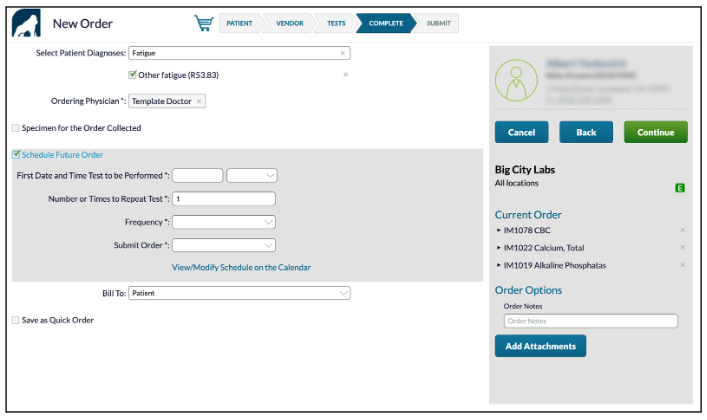
The next screen allows you to enter the Patient Diagnosis, the Ordering Physician (which defaults to the provider who logged in to enter the order), allows you to select if the specimen for the order was collected, if the order is scheduled for the future, to whom the billing should be submitted, and if you would like to save the order as a Quick Order.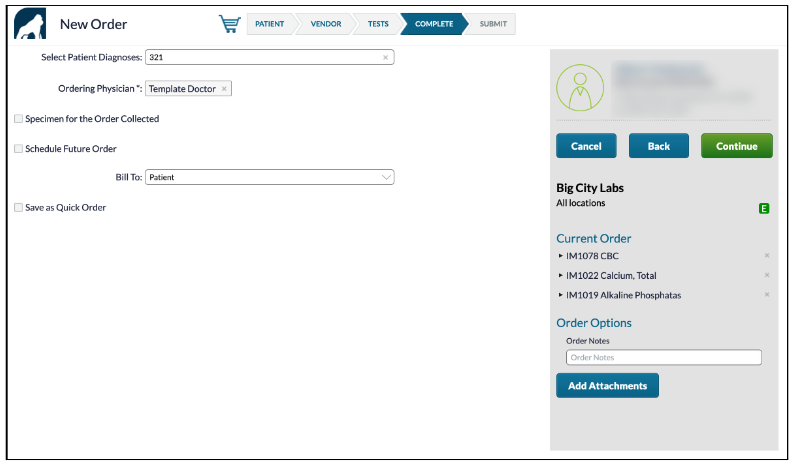
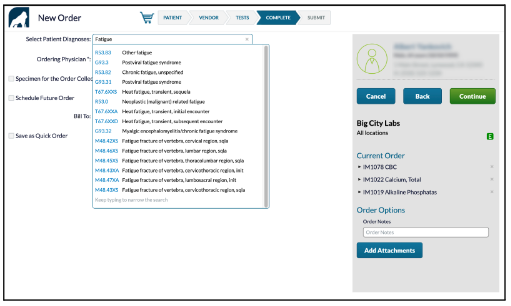
The Patient Diagnosis drop down allows you to enter text related to the code, or if known, the specific diagnosis code.
The Ordering Physician drop down allows you to select an ordering provider, other than the provider that was entered by default. (The ordering physician defaults to the one that is logged in and entering the order).
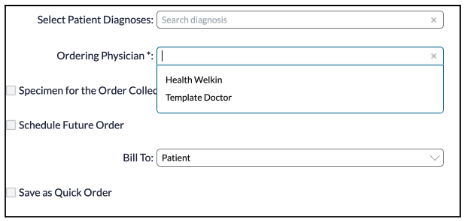
If the specimen for the order has been collected, select the checkbox and enter the date and time the specimen was collected.

If the order is to be collected on a specific time and date in the future, select the Schedule Future Order checkbox. This will require the following fields to be entered:
- First Date and Time Test to be Performed
- Number or Times to Repeat Test
- Frequency
- Submit Order (indicate when the order should be sent to the lab).
- For labs that will be repeated, the schedule can be viewed or modified on a calendar view by selecting the View/Modify Schedule on the Calendar link.
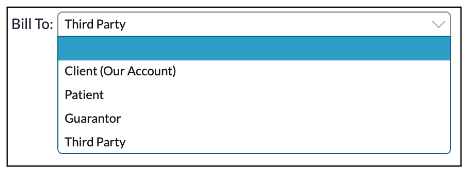
The Bill To drop down indicates where the billing codes should be sent to. The selections available are:
- Client (Our Account) – the bill will be generated and sent to the clients lab account
- Patient – The patient will receive the bill for the full amount, the patient will need to provide insurance information to the labs billing department
- Guarantor – Bill will be generated and sent to the guarantor
- Third Party – The bill will be generated and sent to the insurance company (this information needs to be manually entered by clicking on the patient name to the right. This topic is covered below)
To enter the insurance information on this patient, click on the patient’s name to the right. This will open a pop up which will allow you to enter further patient demographic information as well as primary, secondary, and tertiary insurance information.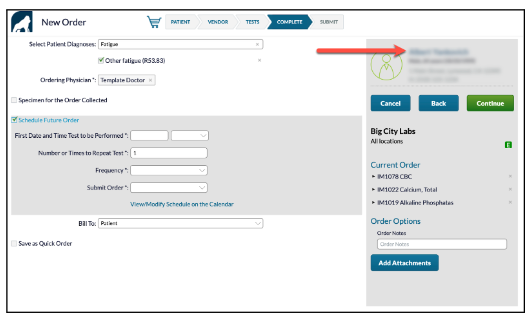
After clicking on the patient name the pop up that will appear will land on the patient demographic information, with certain information pre-filled.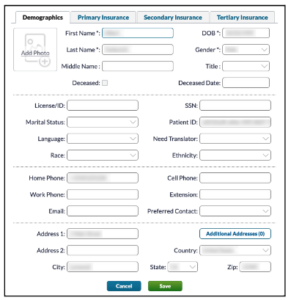
Additional information can be entered, or select one of the Insurance tabs to begin entering the insurance benefit information for this patient.
The Primary, Secondary, and Tertiary Insurance tabs allow the entry of the fields relevant to submitting the claim.
The Payer,
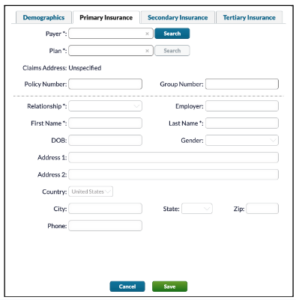
Plan, Relationship, First Name, and Last Name are required fields.
If the Self selection is made in the Relationship drop down – the information will load into the relevant fields with the patient’s demographic information.
Finally, select whether the lab, as ordered, should be saved as a quick order. For further information on Quick Orders, please refer to this article.
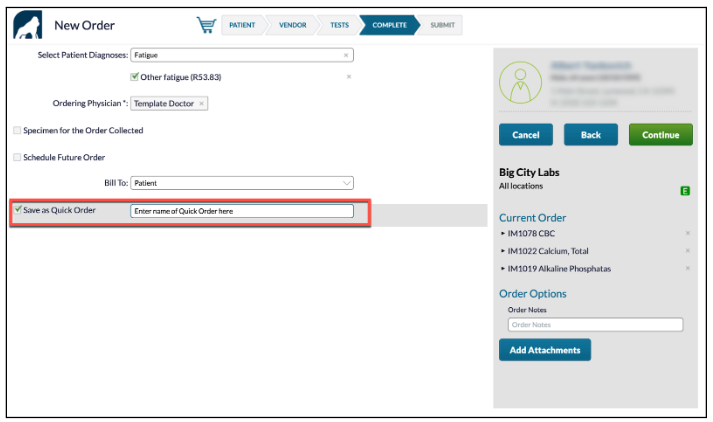
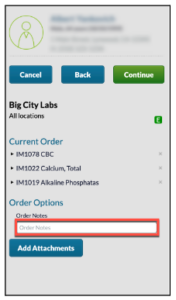
Additional Notes can be entered as free text under Order Options (As outlined in red in the image)
To add attachments, select the corresponding button below Order Notes.
Selecting the Add Attachments button will open a screen which will allow you to select from and attach Results, Documents, Referrals, Orders, or other Files.
Selecting Attach All on this screen will send all attachments in the patients Health Gorilla profile.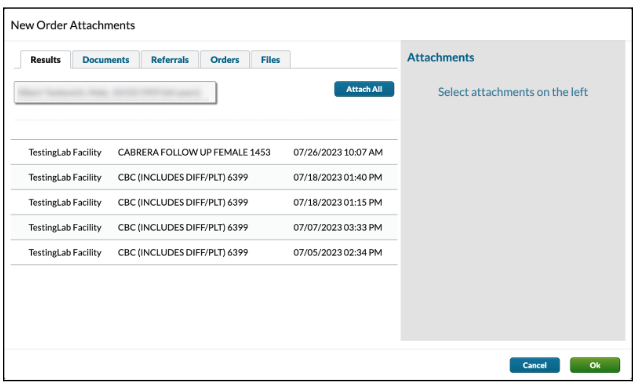
Once you have selected the attachments, click on OK to attach the documents and navigate back to the order completion screen. Select Continue to submit the order.
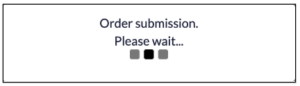
An Order Validation pop up will appear indicating that the order is being electronically sent to the selected lab.
Following the order submission, the order requisition form will appear. This requisition will be sent to the patient document center in Welkin (PDF format).
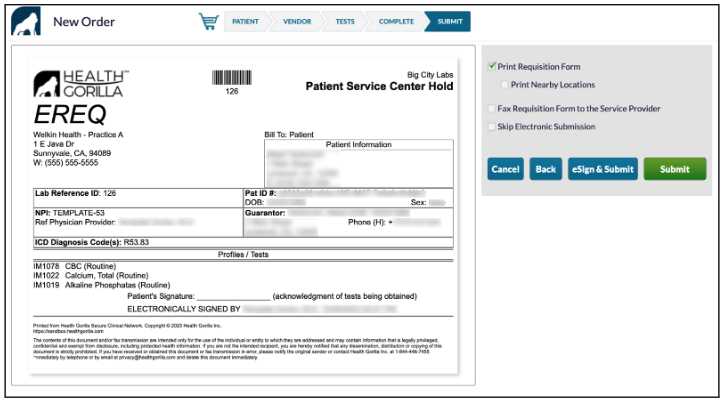
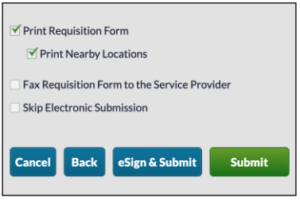
To the right of the requisition form, selections can be made to Print the Requisition Form, Print Nearby Locations, Fax
the Requisition Form to the Service Provider, or Skip Electronic Submission.
In addition, the provider can opt to eSign the requisition form and submit or only electronically submit the order.
Selecting the eSign and Submit button will open a pop up screen with tools to enter relevant information onto the document.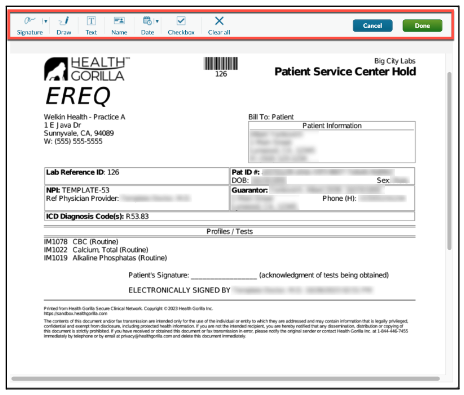
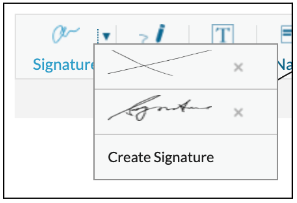
When a provider is first utilizing Health Gorilla to sign a requisition form, they will need to select Create Signature,
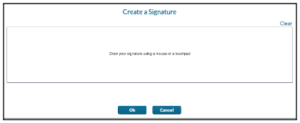
which will allow the provider to draw their signature using a mouse or touchpad.
The signature will be saved and can be selected the next time the provider selects the eSign and Submit option
Click Done when the changes have been completed on the document.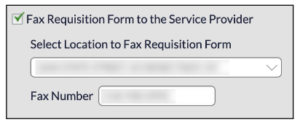
The Fax Requisition Form to the Service Provider checkbox allows you to select the lab location where the order requisition should be faxed to for the patient. Upon selection of the location, the Fax Number will autofill.
Selecting the Skip Electronic Submission checkbox will void sending the requisition form electronically to the lab location.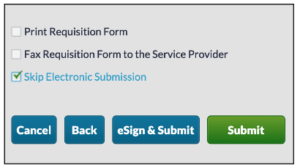
Select the Submit button with the relevant selections. Upon successful completion a small message will appear indicating that the order has been submitted.
More Questions?
If you have any questions, please email the Customer Success Management team at CSM@welkinhealth.com or contact your Implementation/CSM directly.