Knowledge Base
Integrations
Integration Overview
Integration Information
- Acuity Set up
- eRX: Implementation Checklist
- eRx: Overview
- eRx: Setup and Configuration
- eRX: IDP Quick Tips
- eRX: Tokens
- eRX: Completing the EPCS invitation and Logistical Access Control
- eRX: How to Reset the EPCS Passphrase
- eRX: Prescribe Tapered, Titrated, & Variable Dose Medications
- eRX: Reporting
- Labs: Overview
- Labs: Setup and Configuration
- Labs: Creating a Lab Order in Health Gorilla
- Labs: Creating a Quick Order Lab in Health Gorilla
- DocuSign: Implementation Checklist
- DocuSign: Authorization
- DocuSign: Setup and Configuration in Admin
- DocuSign: Setup and Configuration in Designer
- DocuSign: Feature Overview in Care
- DocuSign: Feature Overview in Designer
- DocuSign: Creating Templates
- Docusign: Go Live Process
- eSignature Configuration
- Zoom: Setup and Configuration
- Zoom: How to Configure Zoom in Designer
- Zoom: Where Do I Find My Zoom ID?
- Zoom: Setting Up Waiting Rooms
- Sisense: Change Requests
- Paubox: Setup and Functionality
- Google Calendar Integration
- Welkin Calendar Synchronization App
- Stripe: Setup and Configuration
- Candid: Setup and Configuration
- Candid Integration - Required Fields
- Pre-authorization
- Phone Tree Implementation
- Twilio: A2P Questions & Answers
- SSO Setup
- Configuring Google Single Sign On
- OneLogin: Setup and Configuration
Integration Support
SSO Setup
Welkin’s system provides access to multiple SSO tools through Admin. To enable SSO, follow the below steps.
Step 1. Choose your preferred SSO vendor
In Admin, navigate to “Security Settings” and toggle-on the Single Sign-On “Status” toggle. Next, choose your SSO vendor from the drop-down. Welkin currently supports:
- Okta
- Auth0
- Microsoft Azure
- Onelogin
- PingIdentity
- Google – visit this article for additional details
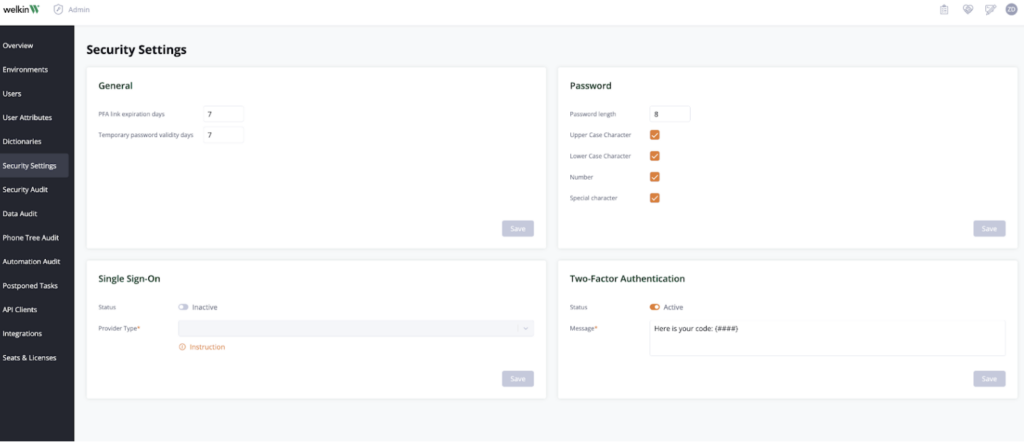
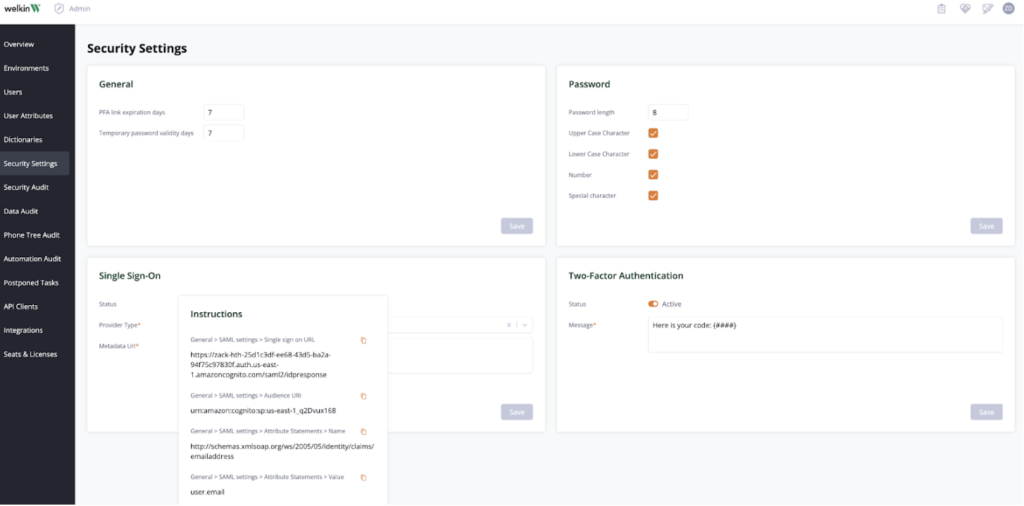
As you make your selection, an instruction area will appear, as well as a field for a Metadata URL. Use the information in the instructions area to update your SSO vendor, and to insert any necessary settings in the Metadata URL.
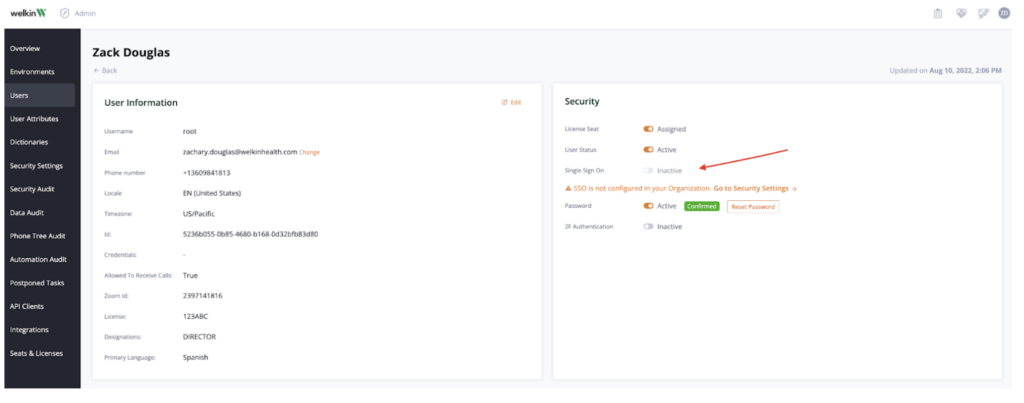
Step 2. Enable SSO at the user level
Once you have completed the configuration, navigate to an individual user or users in Admin, and enable the SSO toggle in the upper-right “Security” area. Your user will now have a button on log-in for SSO.