Knowledge Base
Integrations
Integration Overview
Integration Information
- Acuity Set up
- eRX: Implementation Checklist
- eRx: Overview
- eRx: Setup and Configuration
- eRX: IDP Quick Tips
- eRX: Tokens
- eRX: Completing the EPCS invitation and Logistical Access Control
- eRX: How to Reset the EPCS Passphrase
- eRX: Prescribe Tapered, Titrated, & Variable Dose Medications
- eRX: Reporting
- Labs: Overview
- Labs: Setup and Configuration
- Labs: Creating a Lab Order in Health Gorilla
- Labs: Creating a Quick Order Lab in Health Gorilla
- DocuSign: Implementation Checklist
- DocuSign: Authorization
- DocuSign: Setup and Configuration in Admin
- DocuSign: Setup and Configuration in Designer
- DocuSign: Feature Overview in Care
- DocuSign: Feature Overview in Designer
- DocuSign: Creating Templates
- Docusign: Go Live Process
- eSignature Configuration
- Zoom: Setup and Configuration
- Zoom: How to Configure Zoom in Designer
- Zoom: Where Do I Find My Zoom ID?
- Zoom: Setting Up Waiting Rooms
- Sisense: Change Requests
- Paubox: Setup and Functionality
- Google Calendar Integration
- Welkin Calendar Synchronization App
- Stripe: Setup and Configuration
- Candid: Setup and Configuration
- Candid Integration - Required Fields
- Pre-authorization
- Phone Tree Implementation
- Twilio: A2P Questions & Answers
- SSO Setup
- Configuring Google Single Sign On
- OneLogin: Setup and Configuration
Integration Support
Sisense: Change Requests
Purpose
To ensure that your Sisense Cube is up to date with your latest configuration, you need to take the following steps as a Sisense Data Designer to manage your Sisense Cube. In some instances you will need to open tickets with Welkin in order to ensure your cube is up to date with the latest configuration.
Please review each of the scenarios below and take action accordingly
SCENARIO #1 – Adding CDTf’s to an existing Sisense Table:
If you have an established table in your Sisense cube and you have recently added additional fields you will need to do the following:
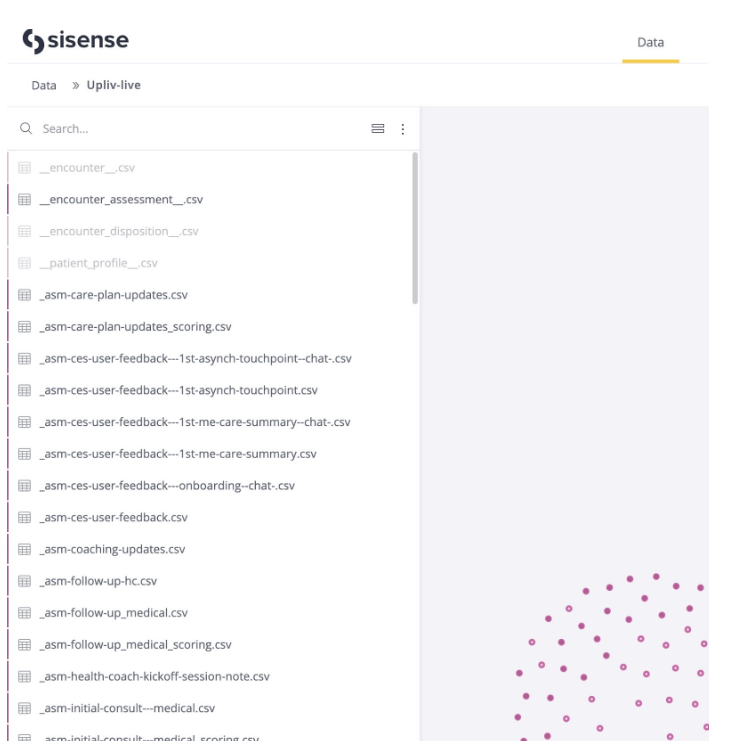
- Review the list of tables in your Cube (screenshot #1)
- Make sure the existing table is located in the list
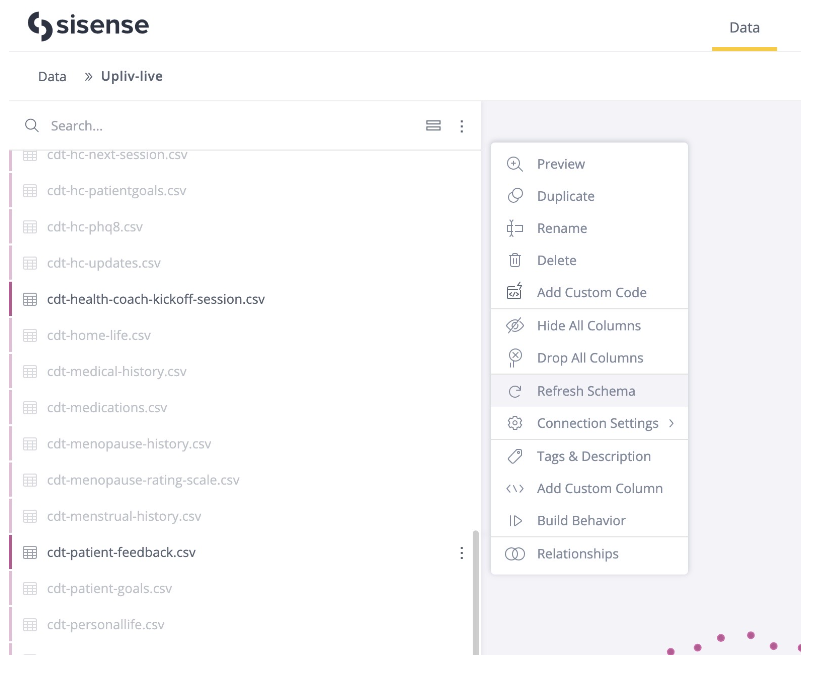
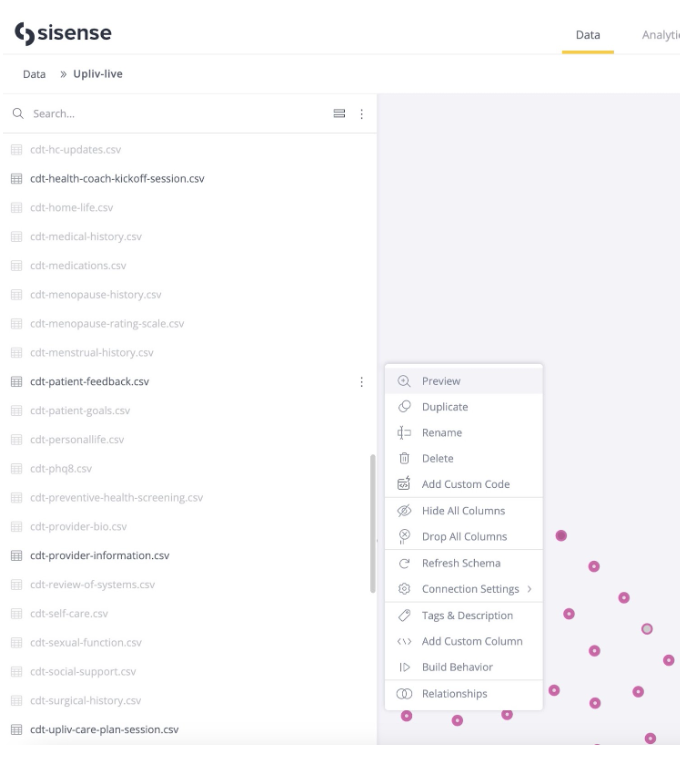
- Right click on the table and select “Refresh Schema” (this will update any new CDTfs) which have been added to the table (screenshot #2)
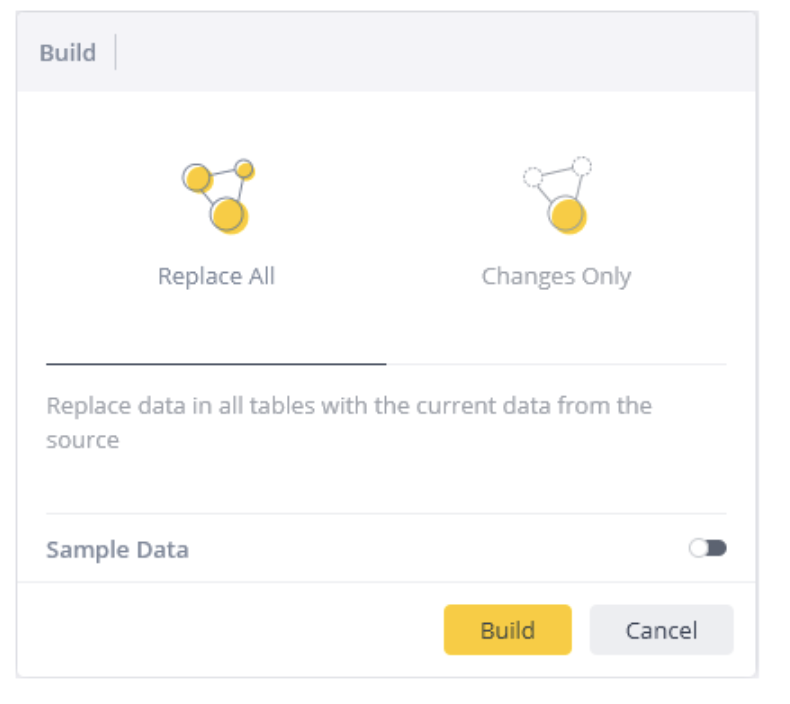
- Click “Build”. The build options are displayed (screenshot #3). Select “Changes Only” and then click “Build” button. When the build is complete, the following message appears in the logs: Build Succeeded
- Validate the table to ensure updates have been made by completing the following steps:
Right click on the table and select “Preview” (screenshot #4)
Review the table columns to ensure that all the new fields are present in the table
*Note: Whenever a schema is refreshed i.e. step 3., please execute step 4. after refresh is completed.
Screenshot #1
Screenshot #2
Screenshot #3
Screenshot #4
SCENARIO #2 – Adding a new Assessment, Form or Table to your Welkin Configuration
- If you have added a new assessment, Form or Table to your Welkin Configuration these will need to be added to your Sisense Live Instance. This needs to be performed by a member of our Welkin Team as our Customers do not have access to AWS S3 bucket connections
- In order to request an update to your Sisense Live Instance complete the following steps:
-Navigate to Jira Service Mgmt (Welkin’s Support System) using the following Link Welkin Support System
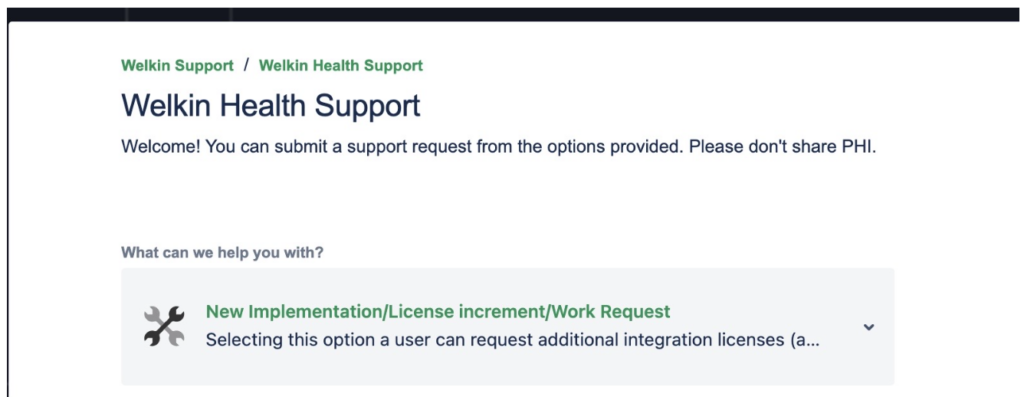
-Select “New Implementation / License Increment / Work Request” (screenshot #5)
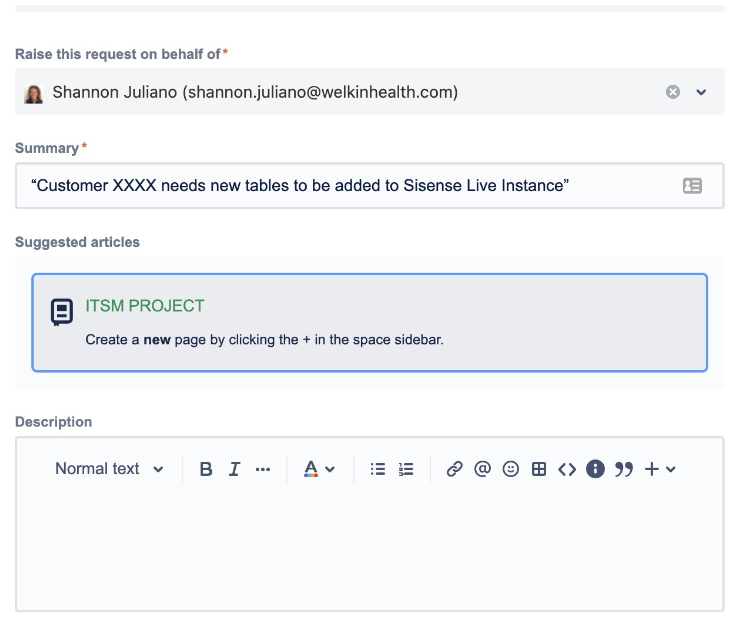
-Put a clear title of what is being requested – Example: “Customer XXXX needs new tables to be added to Sisense Live Instance” (screenshot #6)
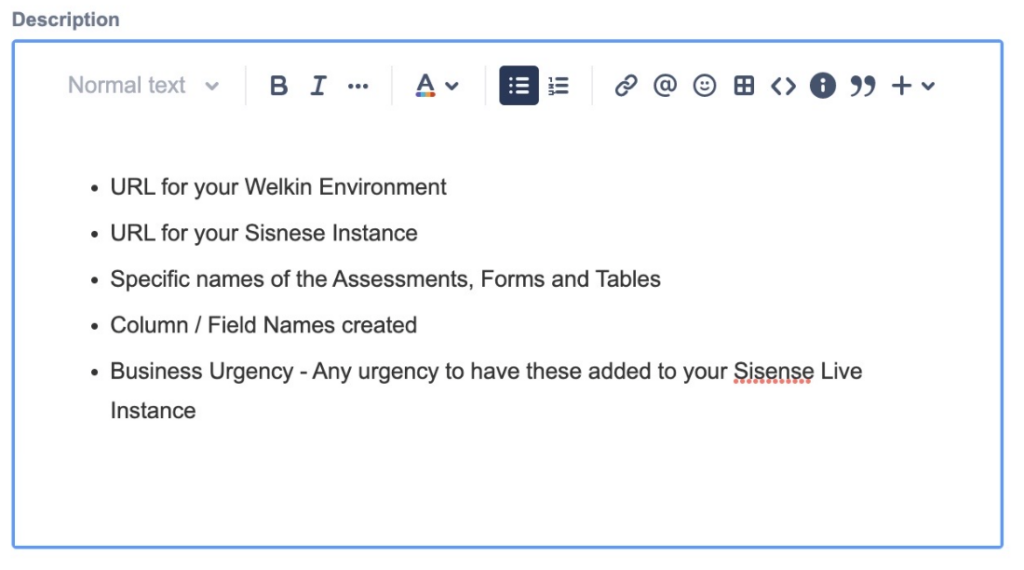
-Put a clear description of the items which you have added to your configuration in the ticket noting the following:(screenshot #7)
-URL for your Welkin Environment
-URL for your Sisnese Instance
-Specific names of the Assessments, Forms and Tables
-Column / Field Names created
-Business Urgency – Any urgency to have these added to your Sisense Live Instance
-*Note – Our standard turnaround time is 2-3 business days for typical service requests of this nature - Submit the Ticket and our team will process the request
- Upon completion of request it is the customer responsibility to complete QA testing to ensure all data fields are as expected
Screenshot #5
Screenshot #6
Screenshot #7
