Knowledge Base
Integrations
Integration Overview
Integration Information
- Acuity Set up
- eRX: Implementation Checklist
- eRx: Overview
- eRx: Setup and Configuration
- eRX: IDP Quick Tips
- eRX: Tokens
- eRX: Completing the EPCS invitation and Logistical Access Control
- eRX: How to Reset the EPCS Passphrase
- eRX: Prescribe Tapered, Titrated, & Variable Dose Medications
- eRX: Reporting
- Labs: Overview
- Labs: Setup and Configuration
- Labs: Creating a Lab Order in Health Gorilla
- Labs: Creating a Quick Order Lab in Health Gorilla
- DocuSign: Implementation Checklist
- DocuSign: Authorization
- DocuSign: Setup and Configuration in Admin
- DocuSign: Setup and Configuration in Designer
- DocuSign: Feature Overview in Care
- DocuSign: Feature Overview in Designer
- DocuSign: Creating Templates
- Docusign: Go Live Process
- eSignature Configuration
- Zoom: Setup and Configuration
- Zoom: How to Configure Zoom in Designer
- Zoom: Where Do I Find My Zoom ID?
- Zoom: Setting Up Waiting Rooms
- Sisense: Change Requests
- Paubox: Setup and Functionality
- Google Calendar Integration
- Welkin Calendar Synchronization App
- Stripe: Setup and Configuration
- Candid: Setup and Configuration
- Candid Integration - Required Fields
- Pre-authorization
- Phone Tree Implementation
- Twilio: A2P Questions & Answers
- SSO Setup
- Configuring Google Single Sign On
- OneLogin: Setup and Configuration
Integration Support
Labs: Creating a Quick Order Lab in Health Gorilla
If your not already familiar with creating Lab orders in Health Gorilla, check out this article here to guide you: Creating Lab Orders in Health Gorilla.
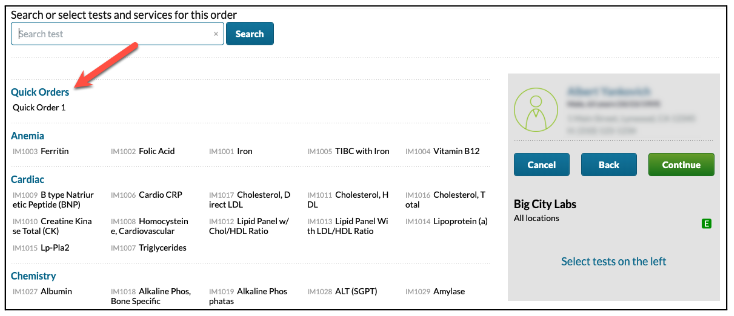
If your organization has a lab panel that is used frequently – this can be created as a quick order. Once created, quick orders will show at the top of the order screen in the Health Gorilla ordering workflow.

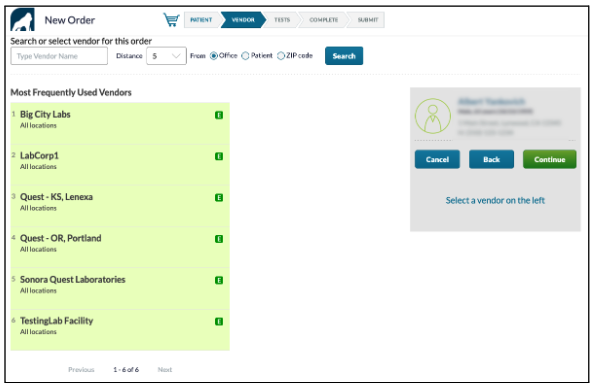
To create a quick order, initiate a new order as you typically would within Health Gorilla and select the lab for which this Quick Order should be associated with.

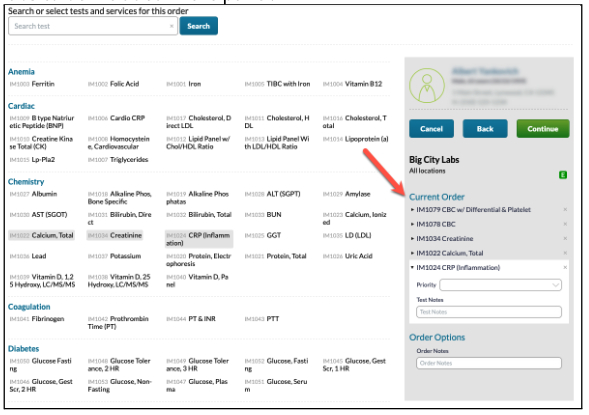
Next, select the labs which should be associated with the panel you are creating, which can be found on the left side of the screen. After selected, labs will appear in the right hand panel under the patient’s name. Review the order and make sure that this includes the labs to be included in the panel.
NOTE:
If the panel is created incorrectly, or needs modification, a JIRA ticket will need to be entered to modify and delete the quick order once it has been created.

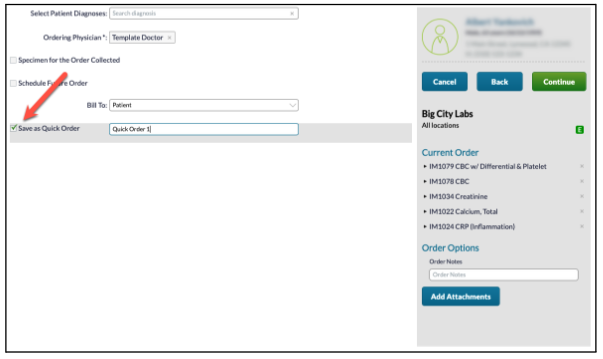
On the next screen, select the “Save as Quick Order” checkbox and enter a name for the new panel. By selecting the Continue button and submitting the order, you will also have created the Quick Order.

More Questions?
If you have any questions, please email the Customer Success Management team at CSM@welkinhealth.com or contact your Implementation/CSM directly.