Knowledge Base
Integrations
Integration Overview
Integration Information
- Acuity Set up
- eRX: Implementation Checklist
- eRx: Overview
- eRx: Setup and Configuration
- eRX: IDP Quick Tips
- eRX: Tokens
- eRX: Completing the EPCS invitation and Logistical Access Control
- eRX: How to Reset the EPCS Passphrase
- eRX: Prescribe Tapered, Titrated, & Variable Dose Medications
- eRX: Reporting
- Labs: Overview
- Labs: Setup and Configuration
- Labs: Creating a Lab Order in Health Gorilla
- Labs: Creating a Quick Order Lab in Health Gorilla
- DocuSign: Implementation Checklist
- DocuSign: Authorization
- DocuSign: Setup and Configuration in Admin
- DocuSign: Setup and Configuration in Designer
- DocuSign: Feature Overview in Care
- DocuSign: Feature Overview in Designer
- DocuSign: Creating Templates
- Docusign: Go Live Process
- eSignature Configuration
- Zoom: Setup and Configuration
- Zoom: How to Configure Zoom in Designer
- Zoom: Where Do I Find My Zoom ID?
- Zoom: Setting Up Waiting Rooms
- Sisense: Change Requests
- Paubox: Setup and Functionality
- Google Calendar Integration
- Welkin Calendar Synchronization App
- Stripe: Setup and Configuration
- Candid: Setup and Configuration
- Candid Integration - Required Fields
- Pre-authorization
- Phone Tree Implementation
- Twilio: A2P Questions & Answers
- SSO Setup
- Configuring Google Single Sign On
- OneLogin: Setup and Configuration
Integration Support
DocuSign: Feature Overview in Care
Docusign is Welkin’s vendor for eSignature. This enables providers and/or patients to sign or countersign documents.
Within Care, navigate to patients in the green vertical menu bar and select or search for your patient by clicking on the magnifying glass

In the Patient Profile, click on Documents
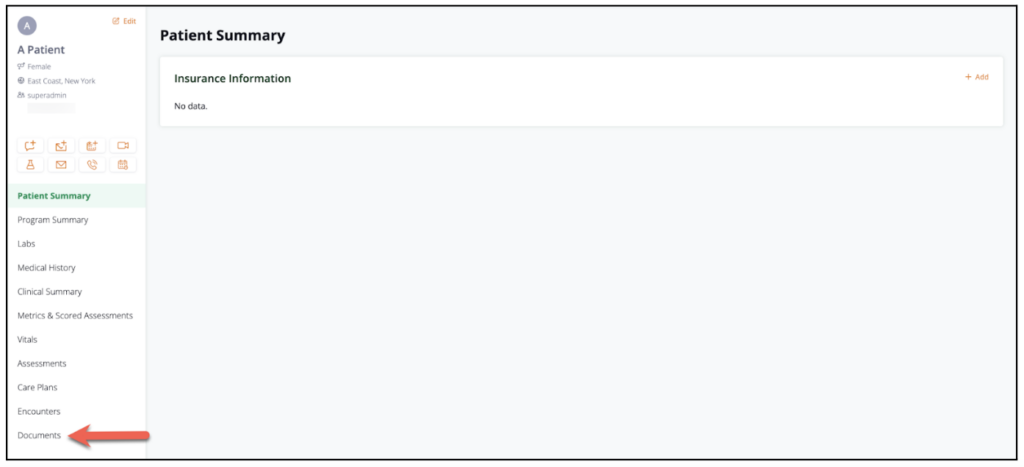
To send a Document to be signed, click on the “+Docusign” button
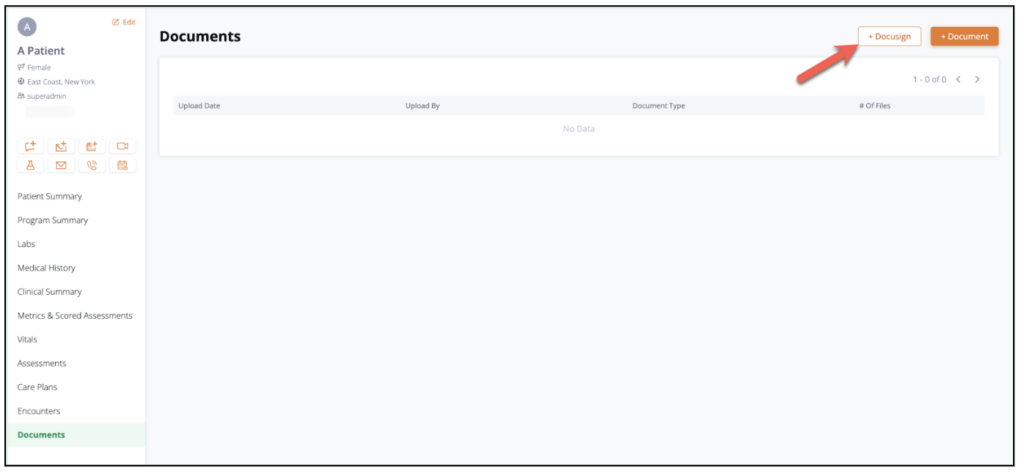
A side-bar will appear on the right side of the screen. Select the Docusign template you would like to send.
Docusign templates are configured in Docusign and then added within Designer. For more information please review Docusign – Designer Configuration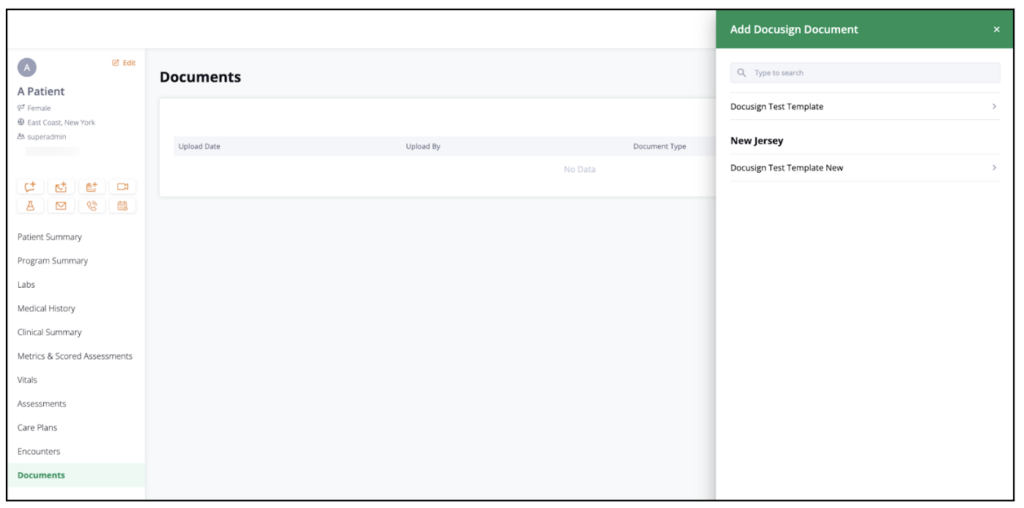
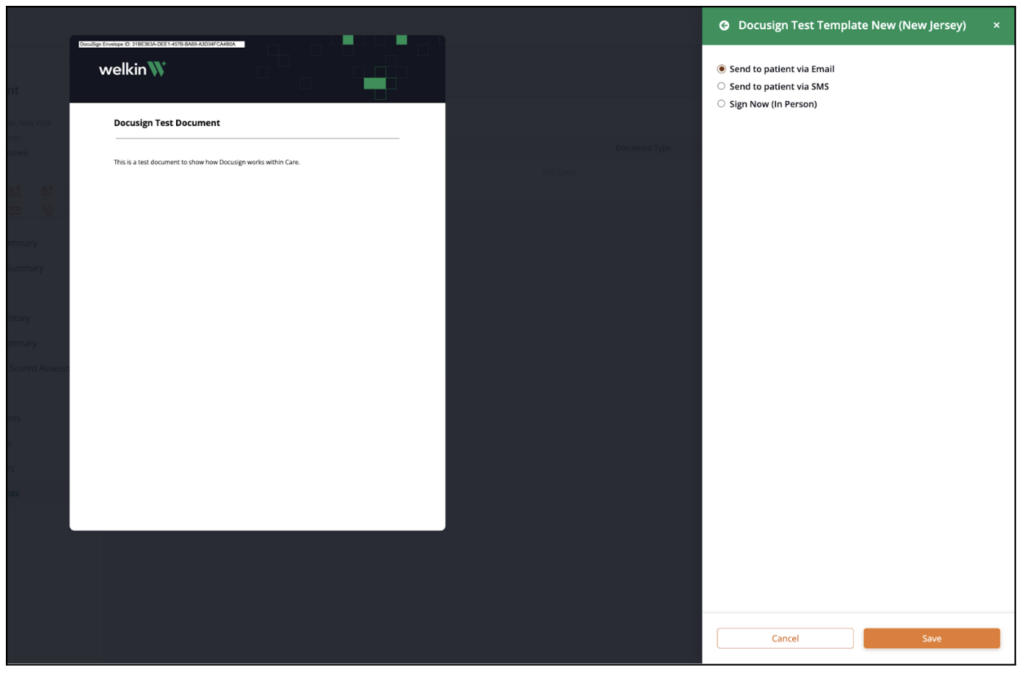
After selecting the template, a new side-bar will appear. Select the option of how the document should be sent: Email, SMS, or Sign Now. For this example, Email is selected.
A preview of the document to be signed is displayed to the left of the sidebar.
Click on “Save” to move to the next step
.
A message will be displayed with a green checkbox indicating that the message has been successfully sent
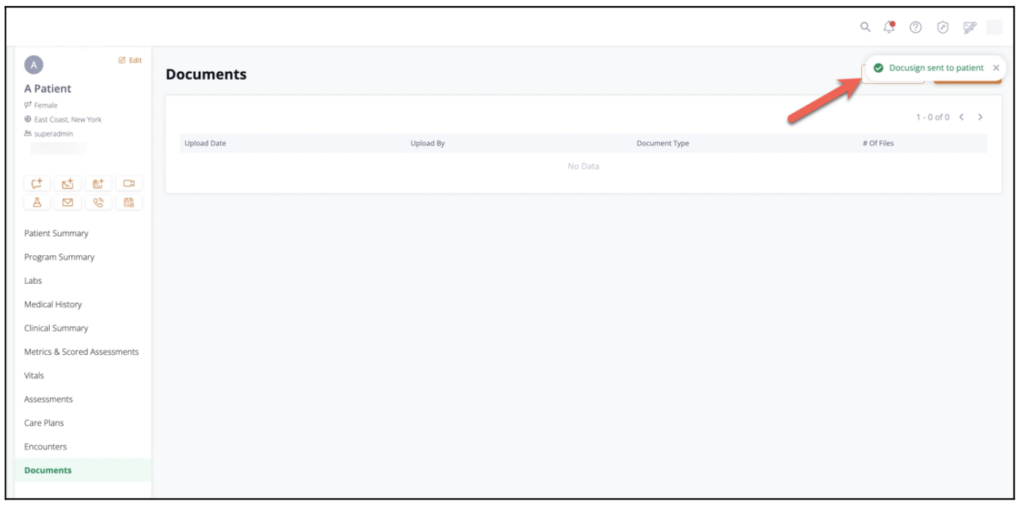
The message recipient will receive an email and will click on the “Review Document” button to proceed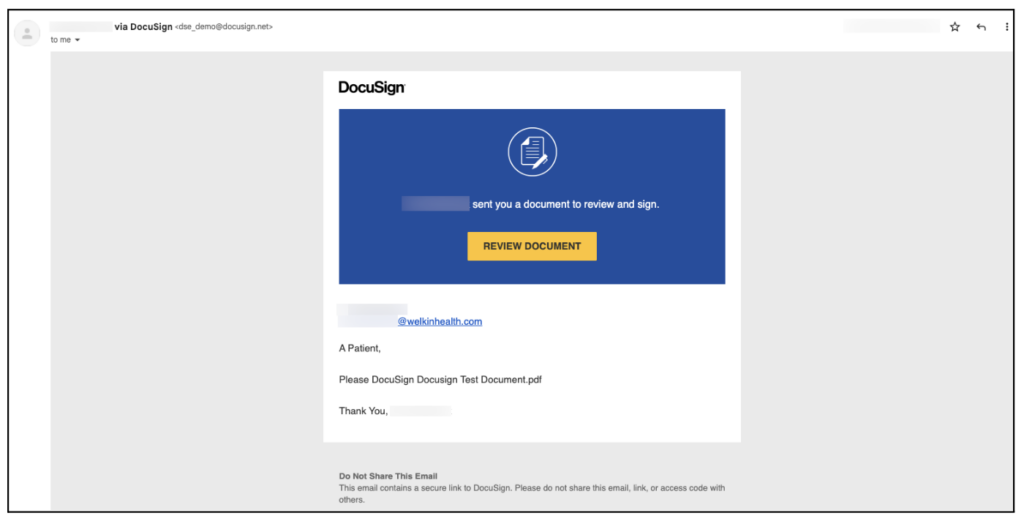
The recipient will review the document and supply the requested information. After completion, the recipient will receive an email indicating that the form has been completed successfully.
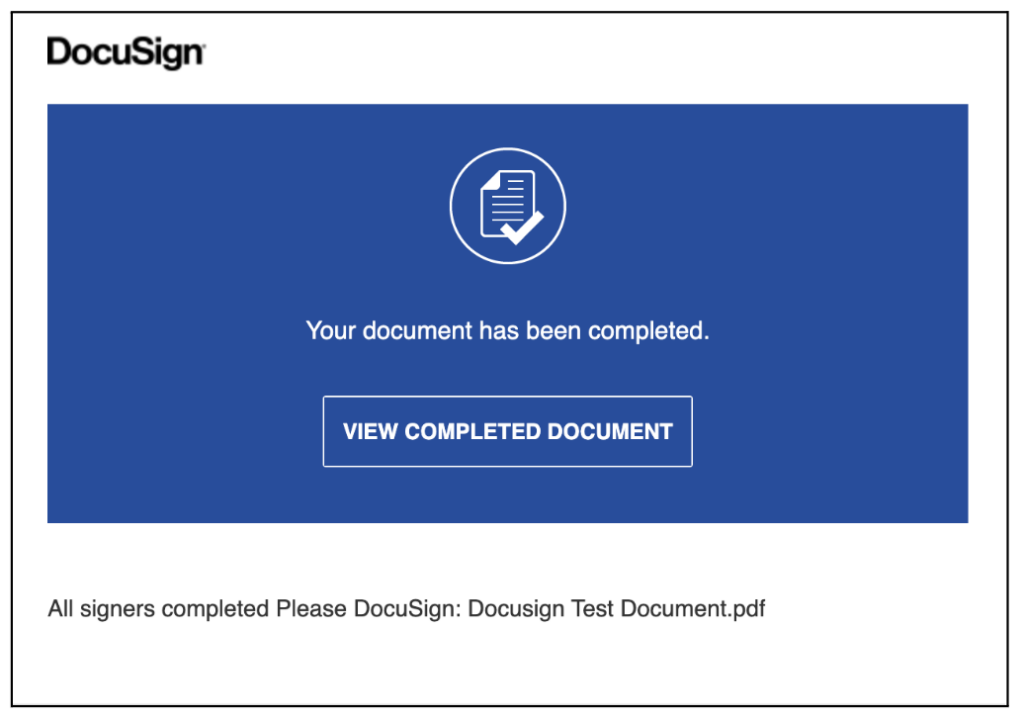
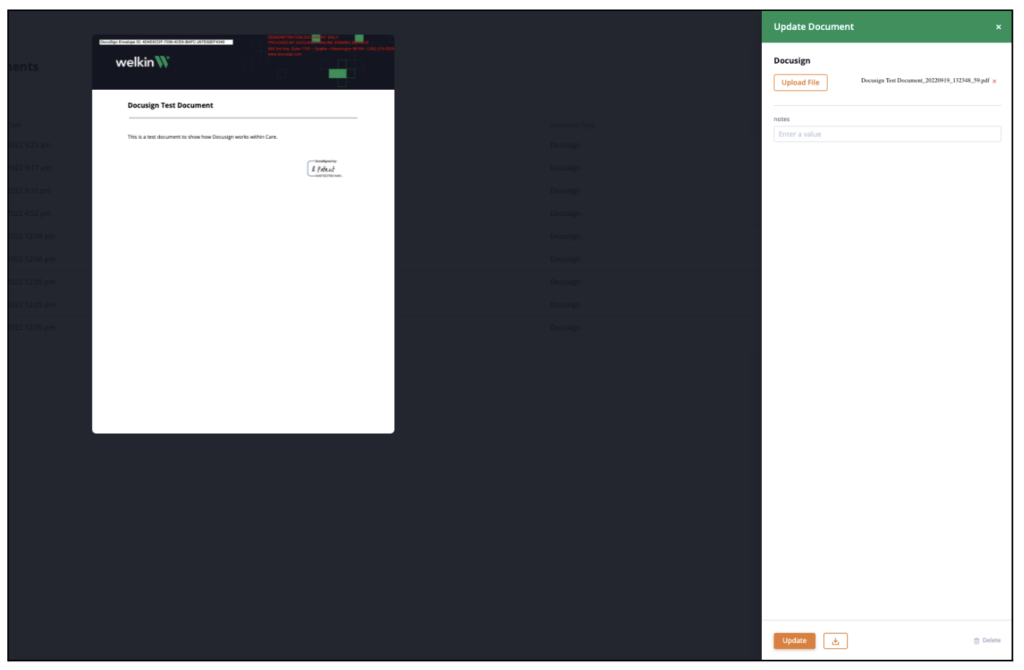
Once a document has been signed, it will be available for viewing in the document center of the patient profile. Click on the number under the “# of files” column to view the document.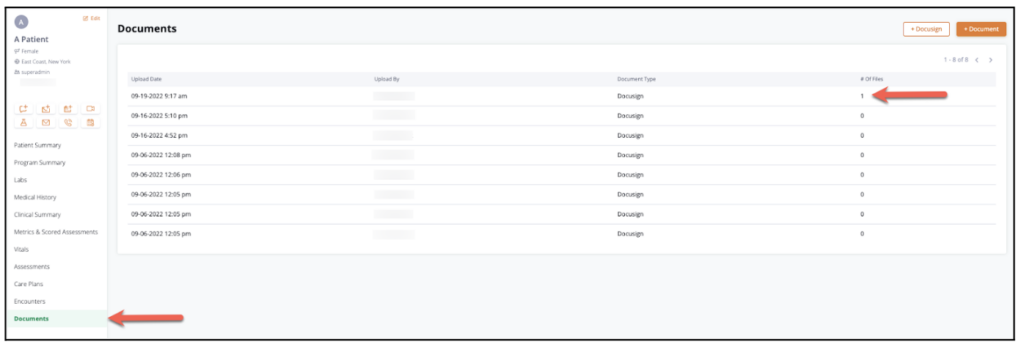
The document preview will appear on screen.
More Questions?
If you have any questions regarding the Docusign Integration or its implementation, please visit the Welkin Health Knowledge-Base or contact your Implementation or Customer Success Manager for more information.