Knowledge Base
Admin
Admin Overview
Admin Users
Admin Security
Admin Environments & APIs
How to turn on your communication methods
Welkin has bi-directional, omni-channel communication capabilities. Unsecured email (Mailgun) and secured email (Paubox), inbound and outbound phone calls (Twilio), SMS/MMS (Twilio), WhatsApp, and live chat (either Welkin’s patient facing app or a live chat application the client uses) are all ways Welkin users can communicate with patients or their representatives.
After the Welkin Support Team has set up the communication link with the vendor(s) in use by your organization, the mode of communication needs to be turned on in the Admin portal.
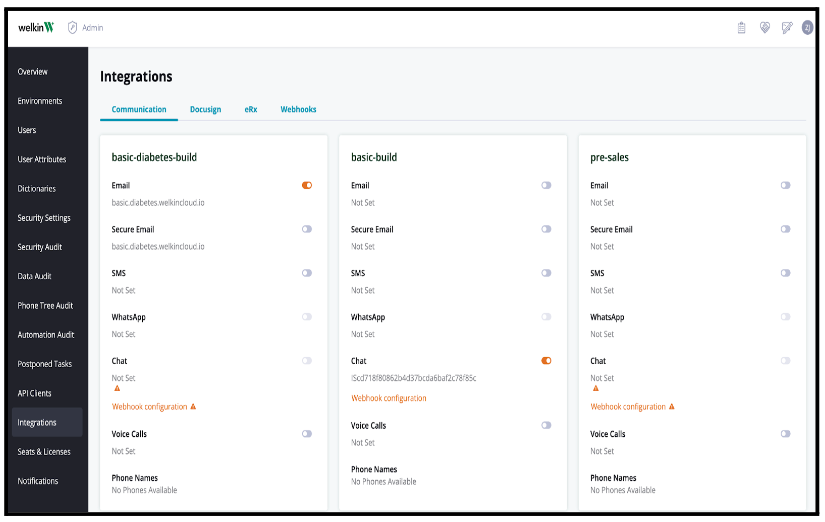
In Admin click on “Integrations” in the left side menu. This will bring up the Communication tab.
Each Welkin environment (sandbox, demo, live/prod, etc.) will be shown with their own communication channels. The channels displayed are:
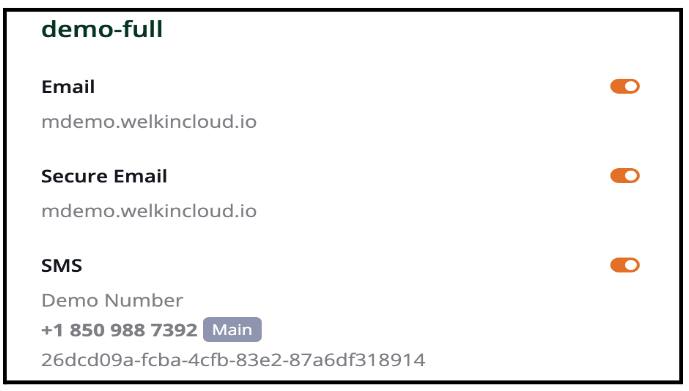
| Secure Email | SMS | ||
| Chat | Voice Calls | Phone Names |
Under each channel, the email subdomain, phone number(s), or API ID will be shown. If “Not Set” appears, that mode of communication has not been configured for the environment.
To activate the communication mode, toggle the switch to the right of the communication type so that the toggle is moved to the right and the switch turns orange.

Turning on Chat will require the “Webhook Configuration” link to be clicked and the chatWebhookURL, webhookAPIKey, and webhookAPISecret to be added.
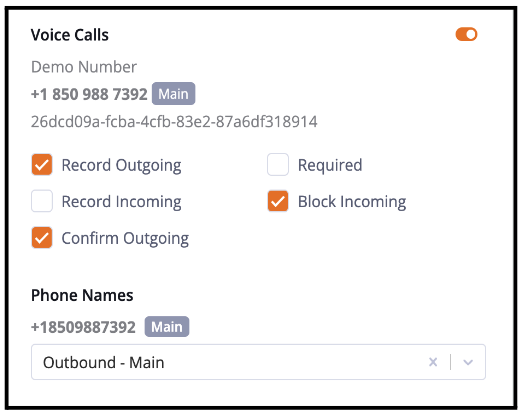
Incoming and Outgoing calls can be recorded. Selecting “Record Outgoing” will allow a “Record Call” toggle switch to appear in

the patient’s Communication Center when making an outbound call. “Confirm Outgoing” will prompt the care team to confirm their outbound call before connection to a patient by playing a message stating, “Press 1 to call the patient.” “Required” will hide the “Record Call” switch in Care but will automatically record all outbound calls.
The Phone Name section allows each phone number to be named so they can easily be identified in Care. The Phone Name is created in Designer.
Once the name is created in Designer you can assign it to each phone number by using the drop-down box under the phone number.
To learn more about communication setup options, follow this link to learn about creating message templates.
More Questions?
If you have any questions, please email the Customer Success Management team at CSM@welkinhealth.com or contact your Implementation/CSM directly.